Tutorial: Overline Desktop App
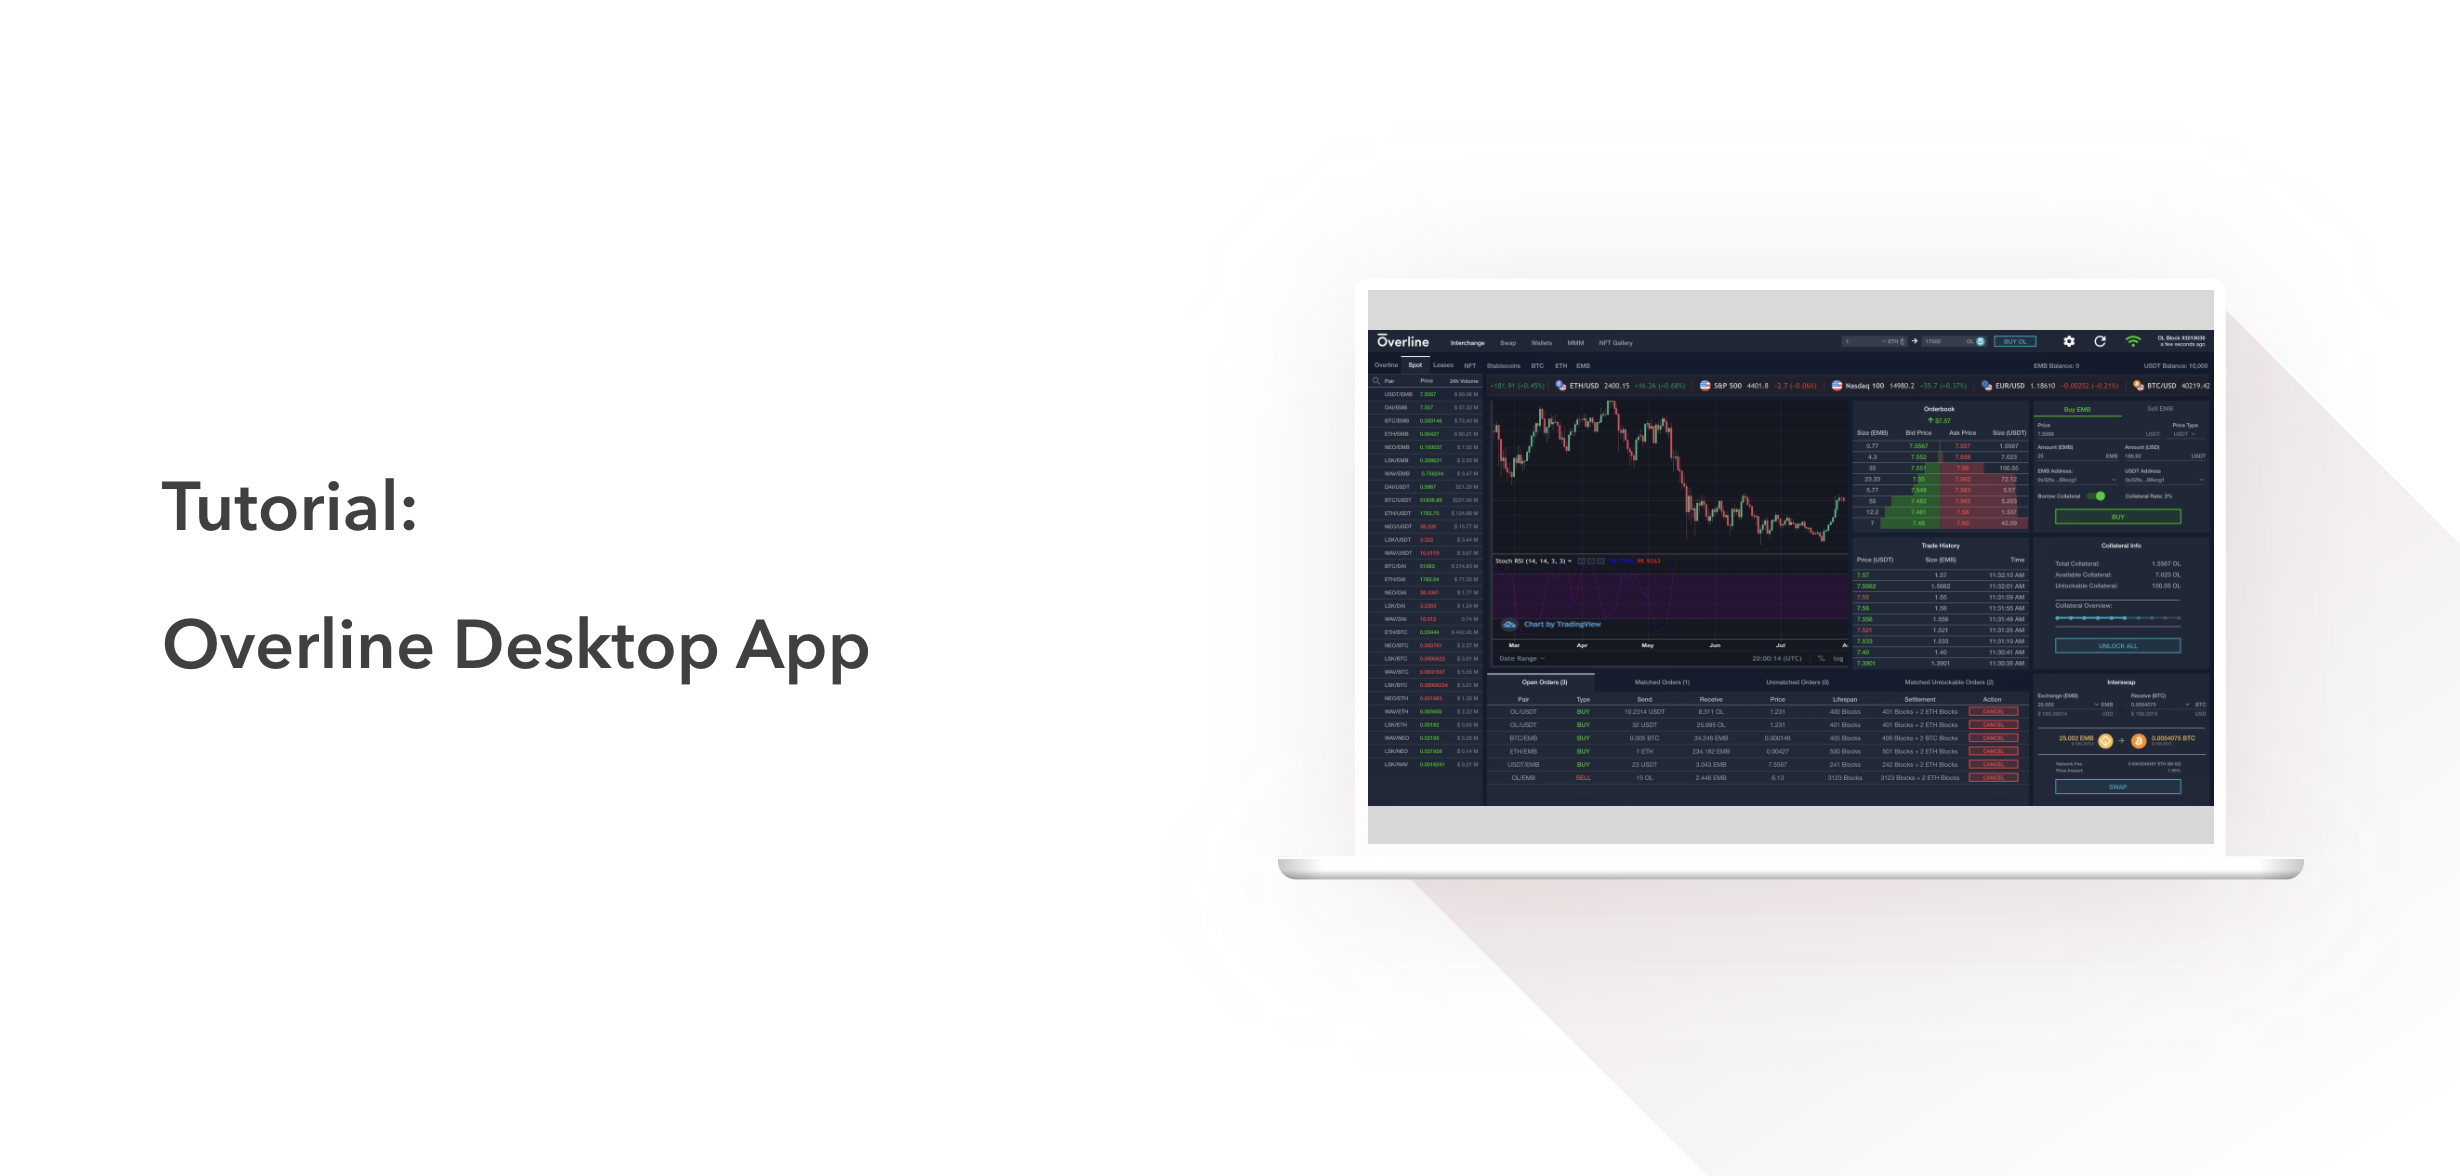
The Overline Desktop App ("desktop app") is the flagship application of Overline creating decentralized markets without the use of validators, relayers, or centralization of any kind. For background on the technology and motivations, feel free to review this page answering the question "What Is the Overline Desktop App?", and the community discussion happening in both EMB Nation & the Advanced Telegram channel.
This page will serve as a comprehensive guide on how to navigate the features and functionalities of the Overline Desktop App. Though designed to be easily followed by any skill level, this guide is recommended for users who are experienced in the crypto space.
1. System Requirements
Before using the desktop, you must first install the application.
With both the application running in tandem with a connected miner, you will be able to execute trades on the desktop app anytime, anywhere with anyone in the world.
To properly support the application, we strongly suggest using hardware devices that meet at least the below requirements:
| Software |
| - Windows: Windows 8 Pro (hypervisor support) through Windows 11 (hypervisor support) |
| - Mac: OSX 10.8+ |
| - Linux: Ubuntu 16.04 LTS or greater up to Ubuntu 19.04 |
| Hardware |
| - 22 GB HDD, 8GB RAM (minimum 6GB) |
The process of setting up the interchange to run on your machine should not vary much based on your operating system.
2. Downloading the Application
Download the application
In order to download the latest desktop version of the Overline interchange, click this link Overline Network, navigate to the Download button, and then choose the version for your Operating System.
Once downloaded, proceed to open the program.
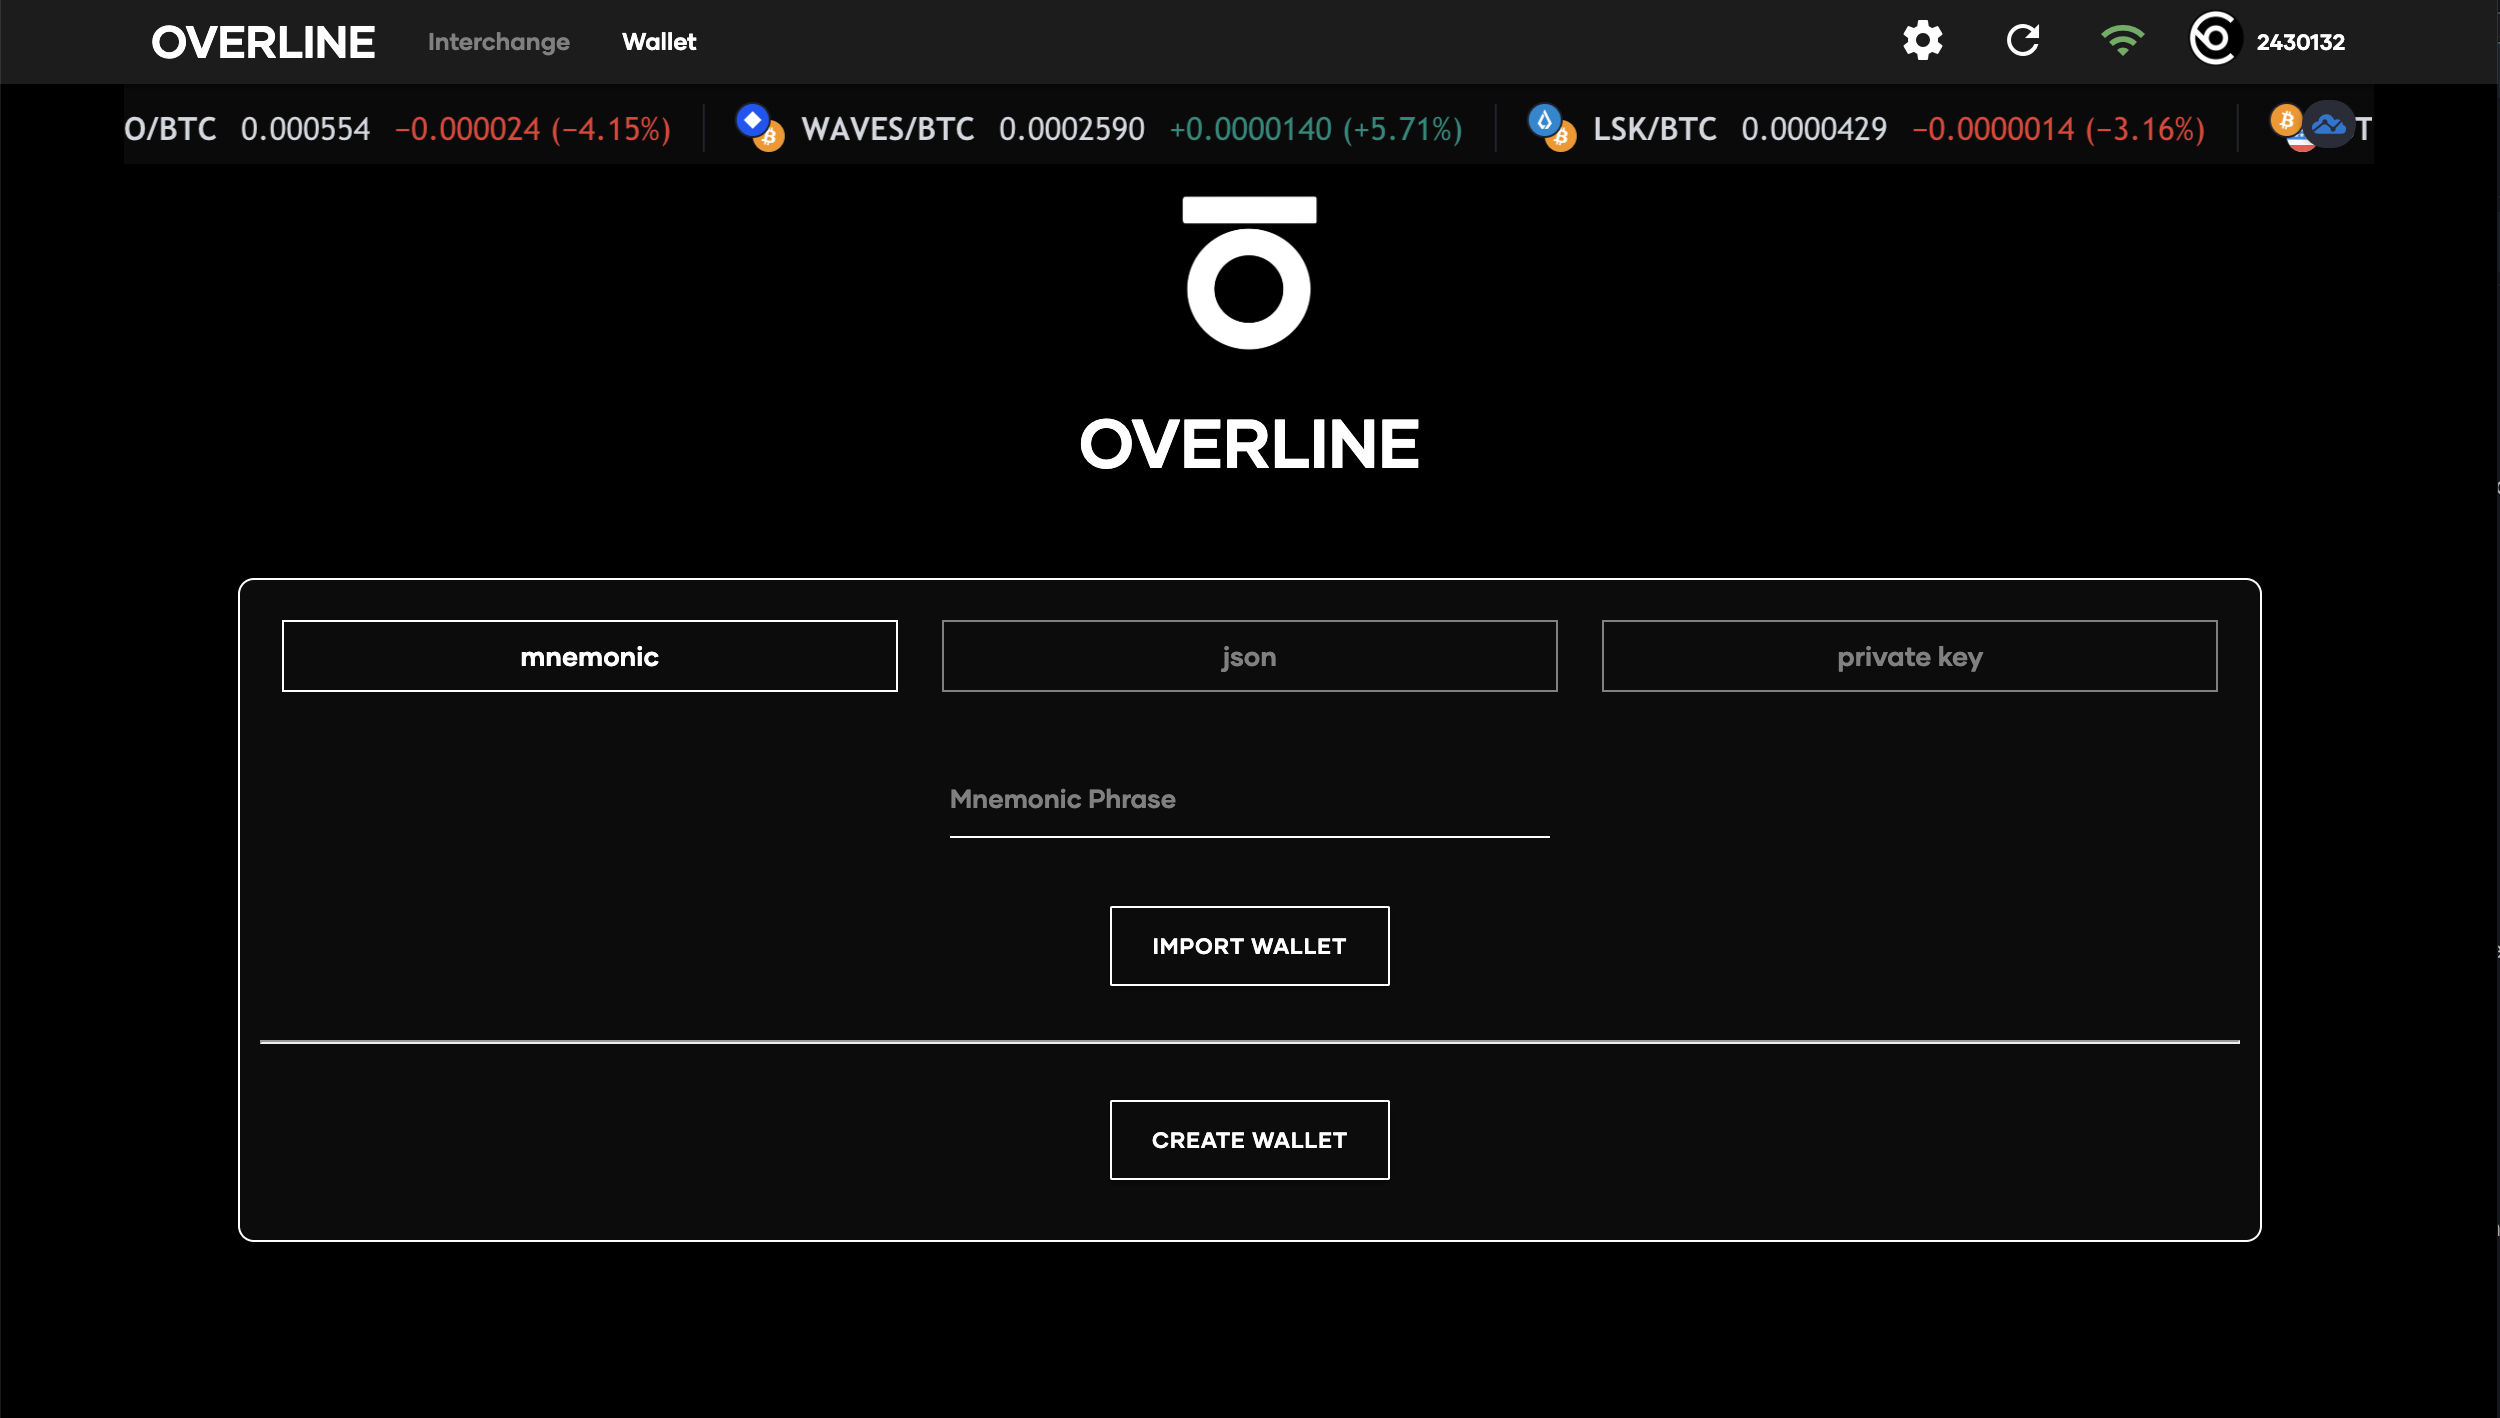
The home page will open to the main gateway and look like this:
3. Starting Your Session
In order to begin using the interchange, you will need to indicate whether you are a new user or a returning user.
Create your new wallet!
Selecting the "new user" option will give you the ability to create a new BSEC wallet. Simply click "CREATE WALLET" and you will have created your new Overline wallet!
You can import an existing wallet as well!
You can alternatively begin your session by selecting "existing user". This will give you the option to import your existing BSEC wallet by uploading a json file, using a private key, or using a mnemonic phrase.
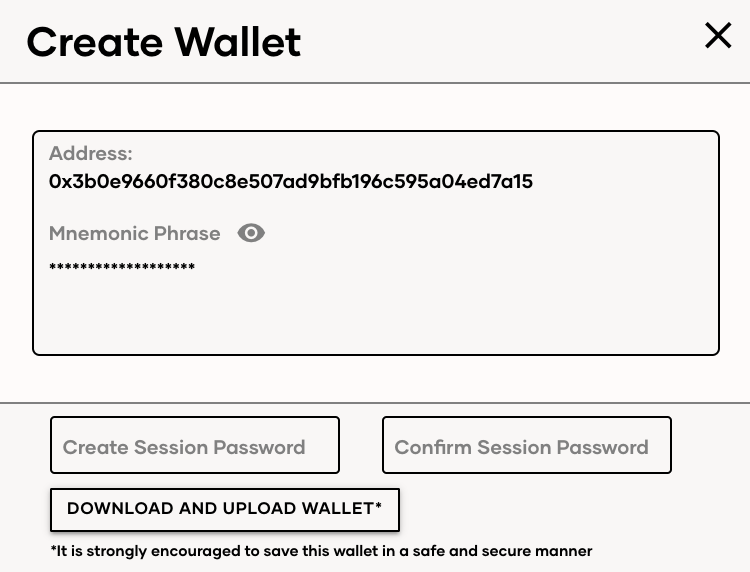
Once the new wallet has been generated, users will see an overview of their new wallet, displaying the public address and mnemonic phrase (hidden) for their new BSEC wallet. These are important and must be kept as safe as possible, as covered in the Beginner's Guide to Mining doc.
Session Password
Whether you create a new BSEC wallet or import an existing one, you must enter and re-enter a "Session Password" to begin using the interchange. This password will be used during your session to confirm actions like making or taking trades and transferring tokens in the wallet section. This password will be session specific and will be reset when you end your session. Think of this as a required security measure that adds a unique, time-sensitive extra layer of security for your interchange activity.
After entering your Session Password, click "Download and Upload Wallet" which will save your wallet file (will be titled "wallet.json") locally, including their private keys/mnemonic recovery phrase you can use to import this wallet during later sessions, and open the wallet section of the interchange.
IMPORTANT:
You MUST save your wallet file or you will not be able to access your wallet in the future.
This should worry you.
While cryptocurrencies provide unparalleled technological security, the cost of this security is that there is no "undo" button or "password reset" for your wallet. If you lose your Private Key, there is no failsafe.
We recommend taking the security and privacy of your wallet very seriously. Rule of thumb is do everything as slow as possible, especially the first time.
Here is a video with some popular ways of ensuring that your wallet (that new file) is secure: https://www.youtube.com/watch?v=Dtsmrb4Gyck
4. The Navigation Bar
Now that you have begun your interchange session, let's review the different sections of the application and their purpose.
Interchange

The Interchange tab on the Navigation bar will take you to the trading section of the interchange. This is where you will be able to analyze recent market activity, buy and sell across different pairs, and view open orders on the market.
Wallet

The wallet tab on the Navigation bar is the first place you will need to go, as a BSEC wallet is required for trading. On this page, you can generate or import wallets, transfer tokens to different addresses, and review transaction histories for your wallets.
Trade Settings

The Trade Settings tab (cog icon) allows you to set, or update, personal trade settings for your interchange session. These settings are covered later in this document.
Refresh

Clicking on the Refresh icon will refresh the page. If something is inaccurately displayed on the wallet / trade tabs or if the miner connection is delayed, rely on this refresh button as a first line of defense.
Connection Settings

The Connection Settings tab is where you can select how you would like to connect to the Overline peer-to-peer network. The "automatic" option allows you to connect using a randomly selected, secure miner. The "manual" option allows you to connect via a local miner.
TROUBLESHOOTING
If you are having issues with connecting to your miner or to the automatic connection, please try the following suggestions:
Turn off VPN
We have noticed that some VPN's cause issues when connecting to the automatic and manual options for the Interchange.Check Firewall Settings
Ensure that the firewall settings for your miner's IP address allows for inbound and outbound traffic (this has often been the issue for users using a cloud miner as well). If you are running the auto connect option, ensure that your computer's firewall settings will allow inbound and outbound connections so that it can discover peers and communicate with them.Check with Community
If none of the above work, check with Overline Advanced telegram channel and EMB Nation. Members of our community will be happy to help further troubleshoot.
Block Height

This number displays the current Overline block height, which is pulled in from whatever source is being run in the Connection Settings section (this will be discussing later in this guide).
Update to Latest Version

If your current version of the interchange is not the latest version, you will see a prompt at the top of your screen with a link to the download page to update. We STRONGLY recommend updating when you see this prompt as it will provide the most optimal user experience.
5. The Wallet tab
Navigating the Wallet
Imported wallets will display public addresses and balances which show available and spending amounts. Spending amounts are the amount of a token that has been sent to another address but is awaiting confirmation from that child blockchain. In the case of Overline, balances also display collateralized Overline. Successfully imported wallets will be clickable panels that will display to users the transfer and history page for that token.
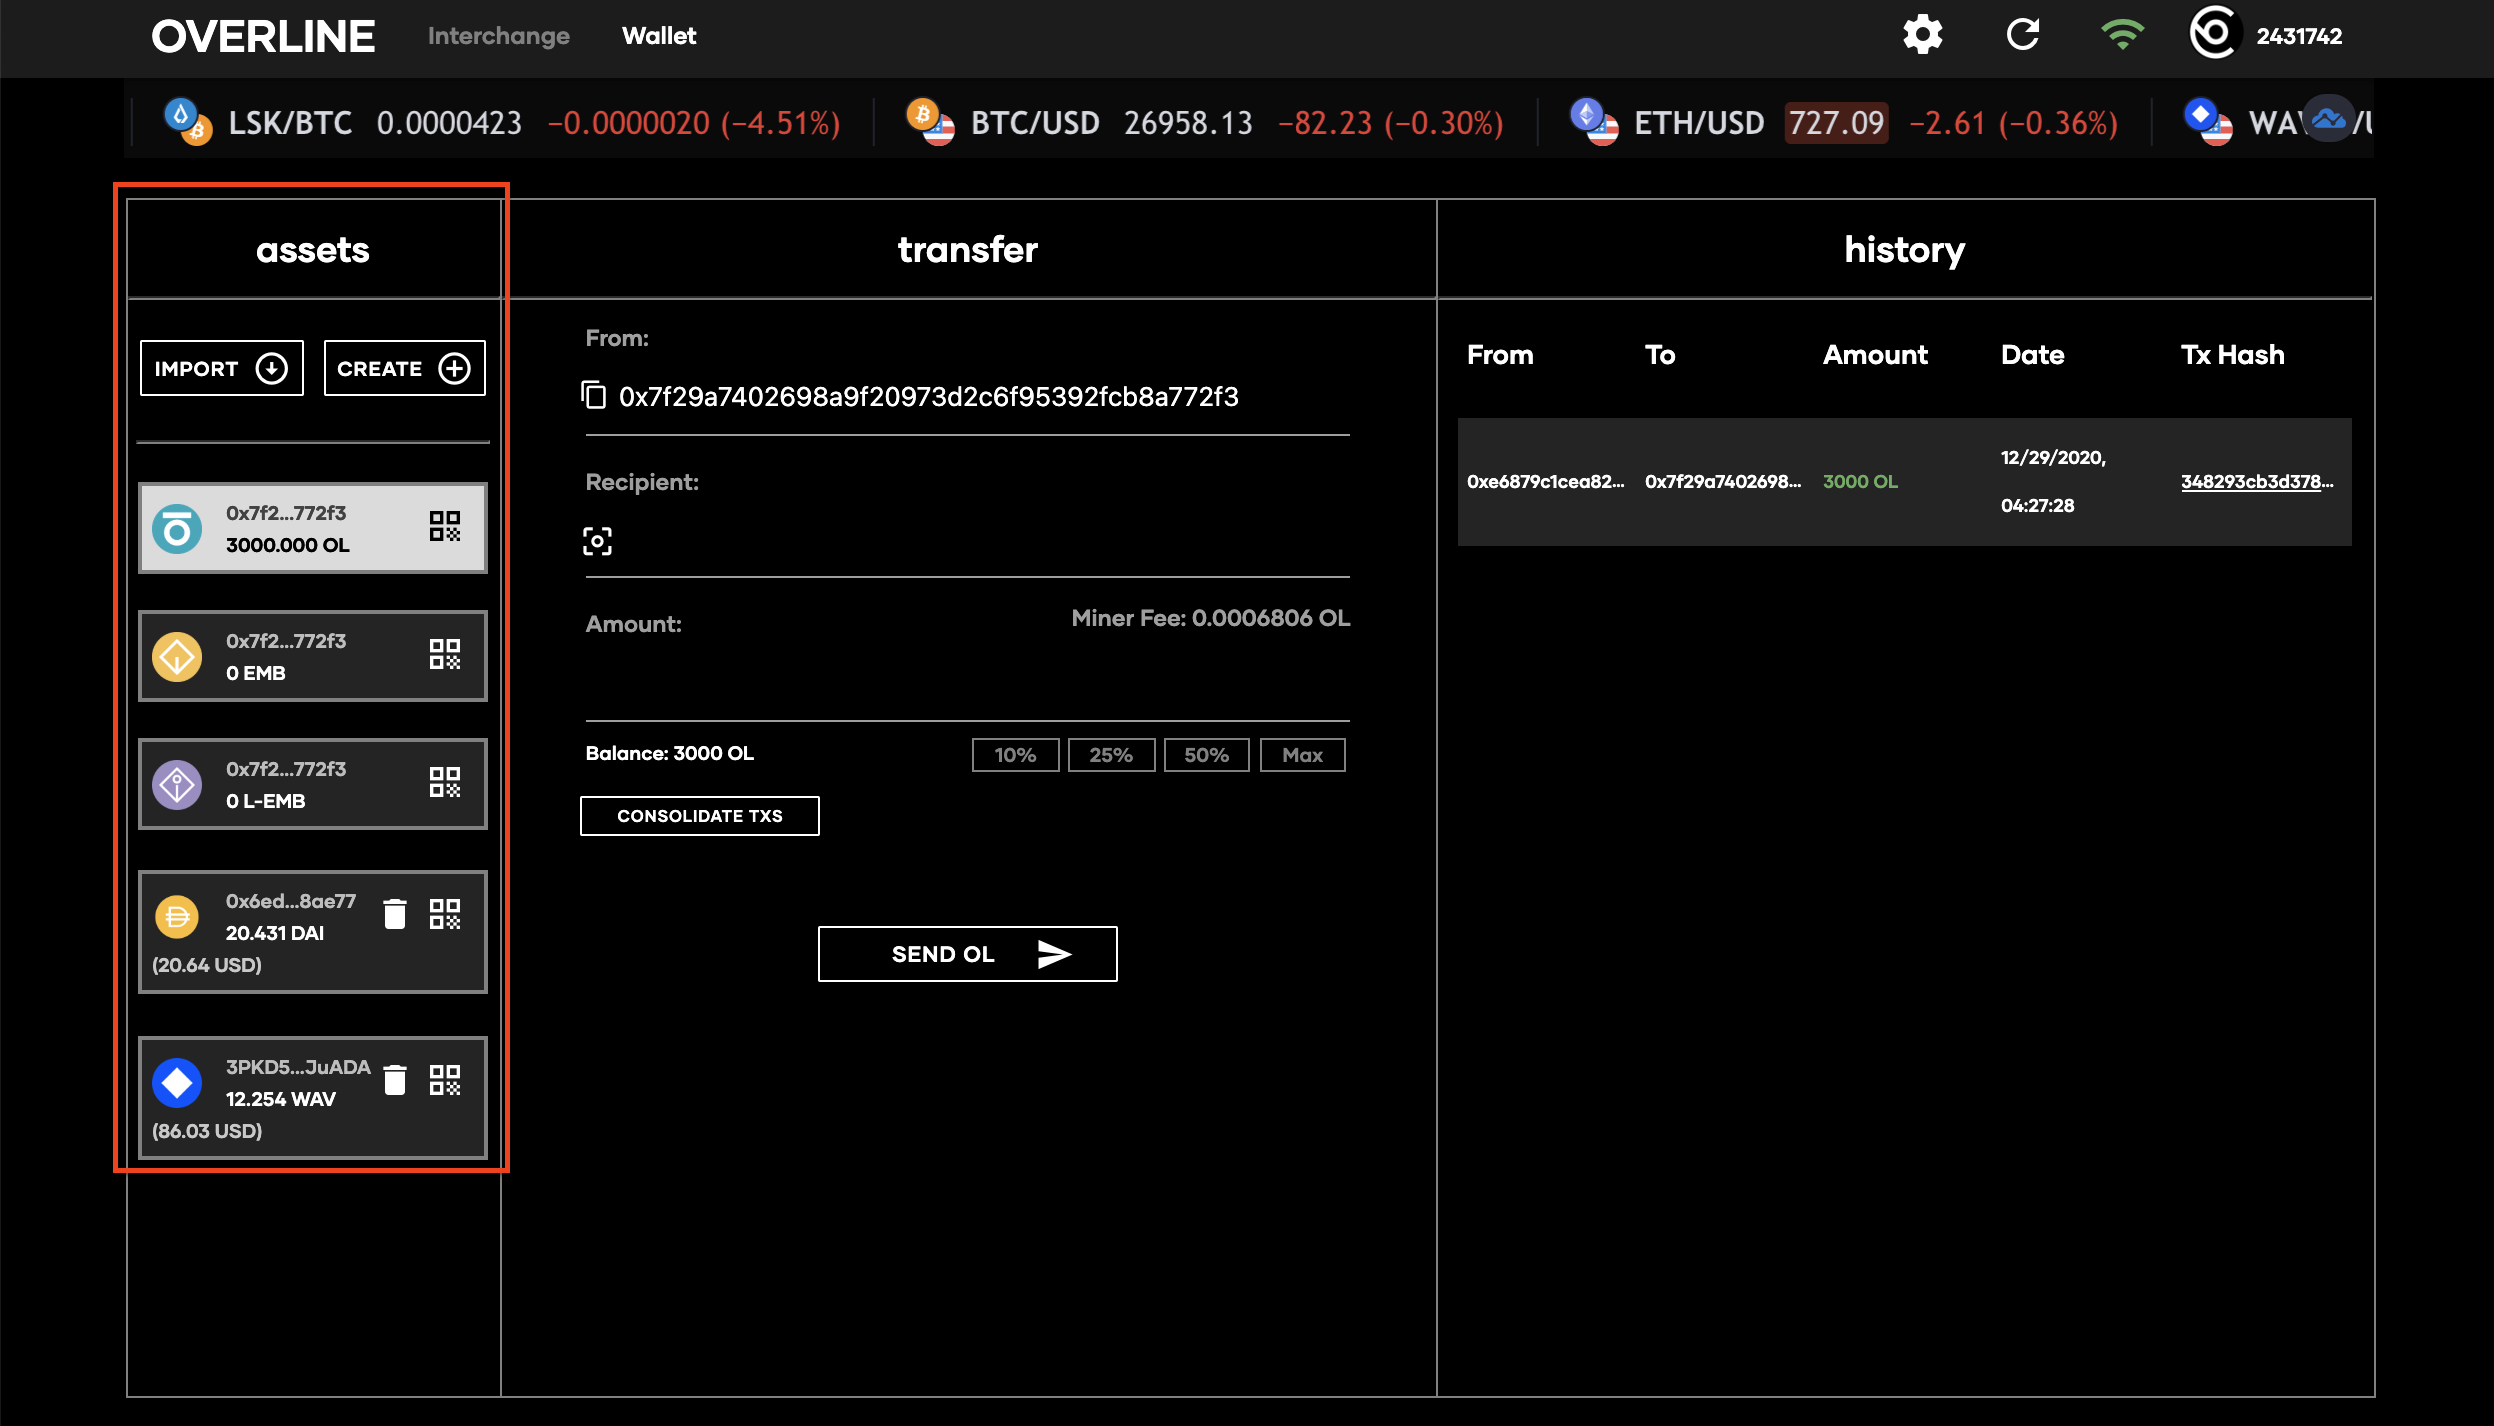
Once you have access to the wallet tab, you can choose to import wallets from any of the 5 child chains, either of the two stable coins, or any of the native Overline coins. By clicking the “Import” button, you can choose which coin you wish to import, then upload a json file or enter a private key, seed (Waves), or passphrase (Lisk) which will allow you to interact with that wallet. You will also need to use your Session Password to import wallets, confirm transfers of that token, or send your side of a trade. Once the Session Password is entered, the new wallet will be imported and available in the wallet tab.
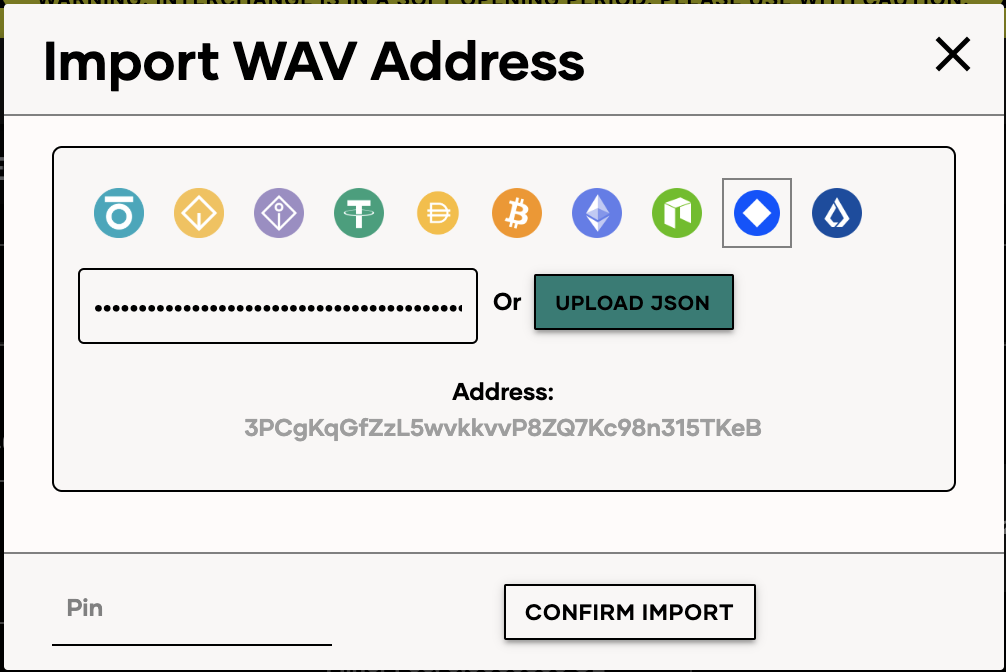
You can also generate multiple new wallets by clicking "Create" next to your desired asset. This process is nearly identical to the creation of the BSEC Wallet from earlier in this walkthrough. You can create/import as many token wallets as you would like.
Transferring Assets
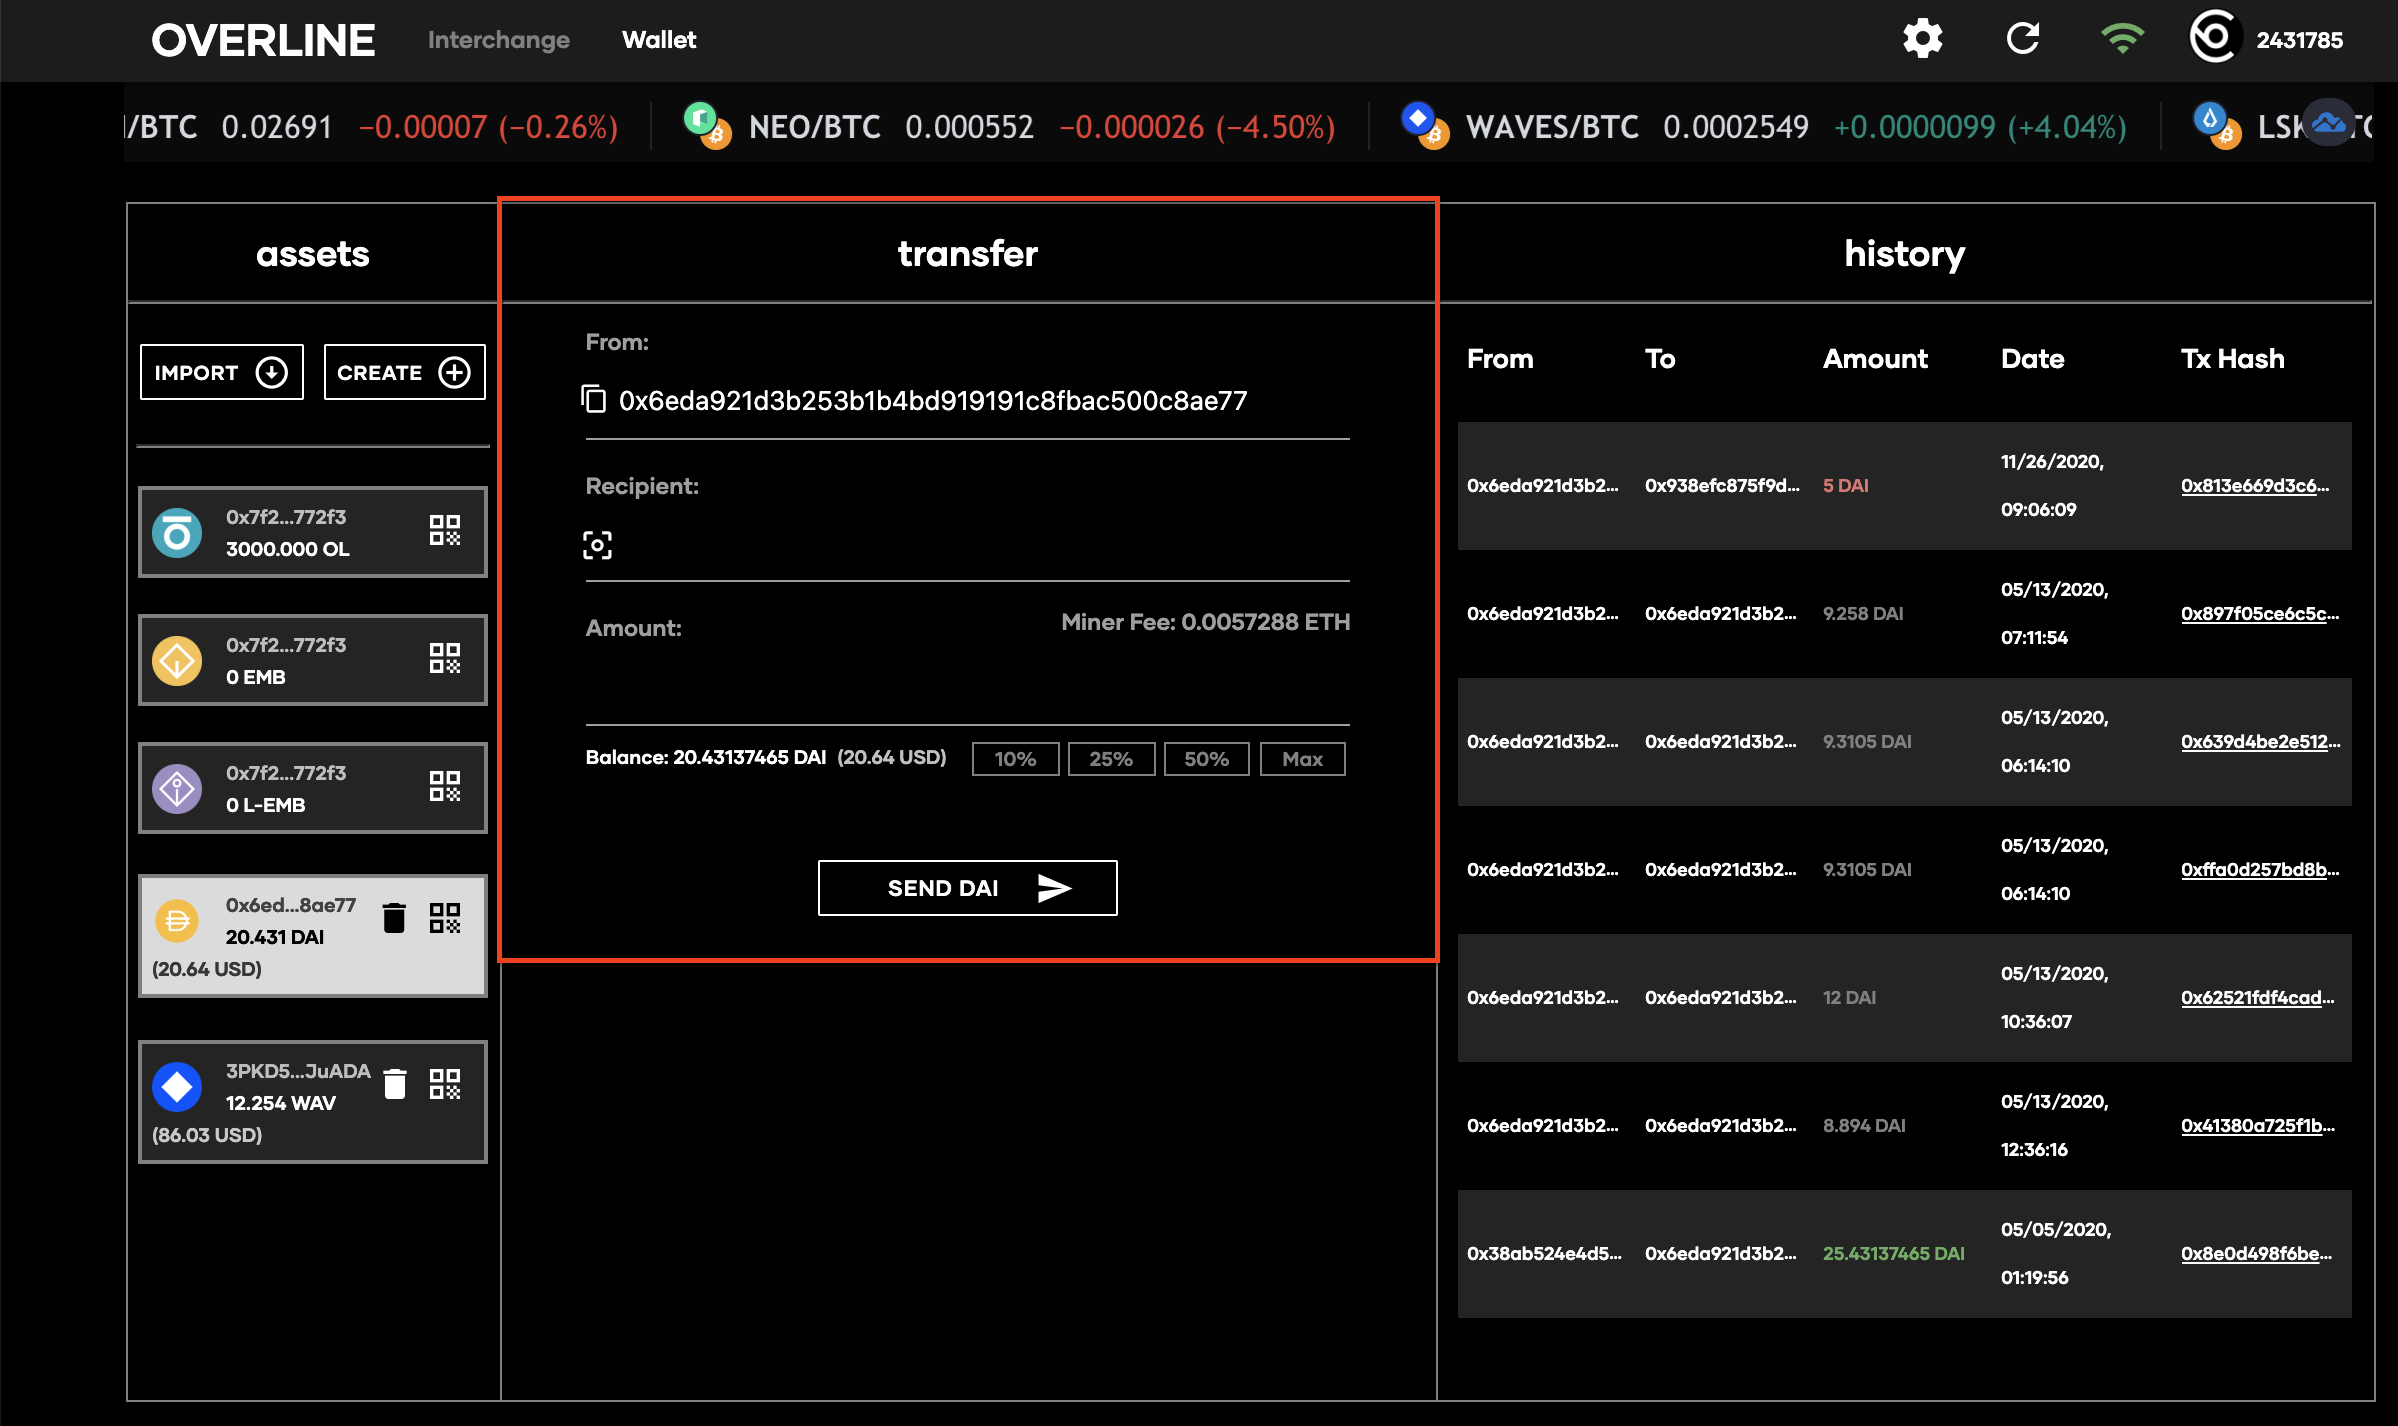
By entering in an amount and a recipient, you may transfer tokens to any wallet for that specific token (i.e. Overline-Overline). There are auto-fill buttons for 10%, 20%, 50%, and MAX, which will fill the amount field with the given percentage of the available balance. Once you have determined the amount you would like to send to a given address, simply click "Send" to review and submit the transaction.
Confirm Transfer Screen
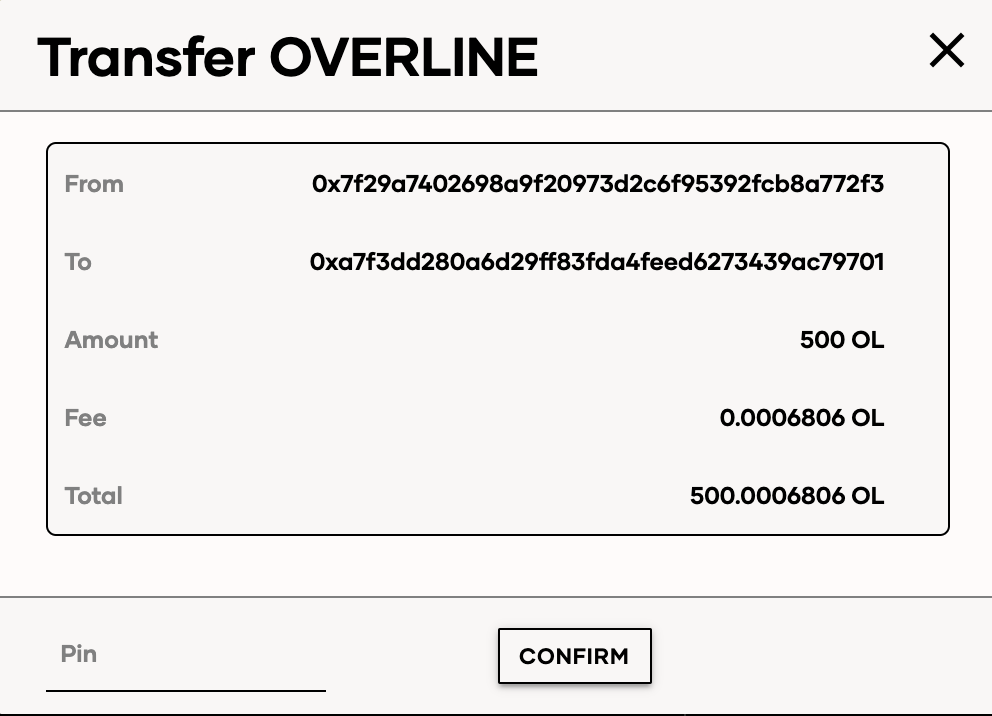
After clicking "Send", you will have access to see the total amount of the Tx. This includes displaying the amount being sent, the Tx fee sent to miners for facilitating the transaction, and the cumulative amount (amount + Tx fee) moved from your address. You can then submit the Tx using the Session Password.
Unlink Wallets / End Session
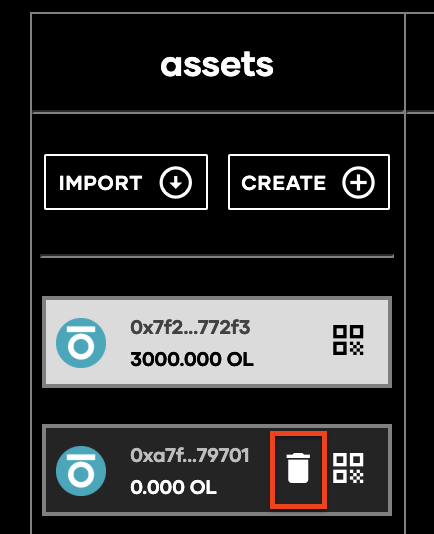
For each of the 5 child chains, and the 2 stable coins, you may unlink your wallets at any time by selecting the wallet and clicking the trash can icon, which will completely remove the wallet from your session. If desired, you can then re-upload the old wallet or upload a different wallet.
For your original OL / EMB / L-EMB wallet, you must end your session to remove, which will remove ALL wallets you have imported will also be unlinked and the interchange session will end. This can be done by opening Settings and clicking "End Session".
6. The Interchange tab
Market Picker
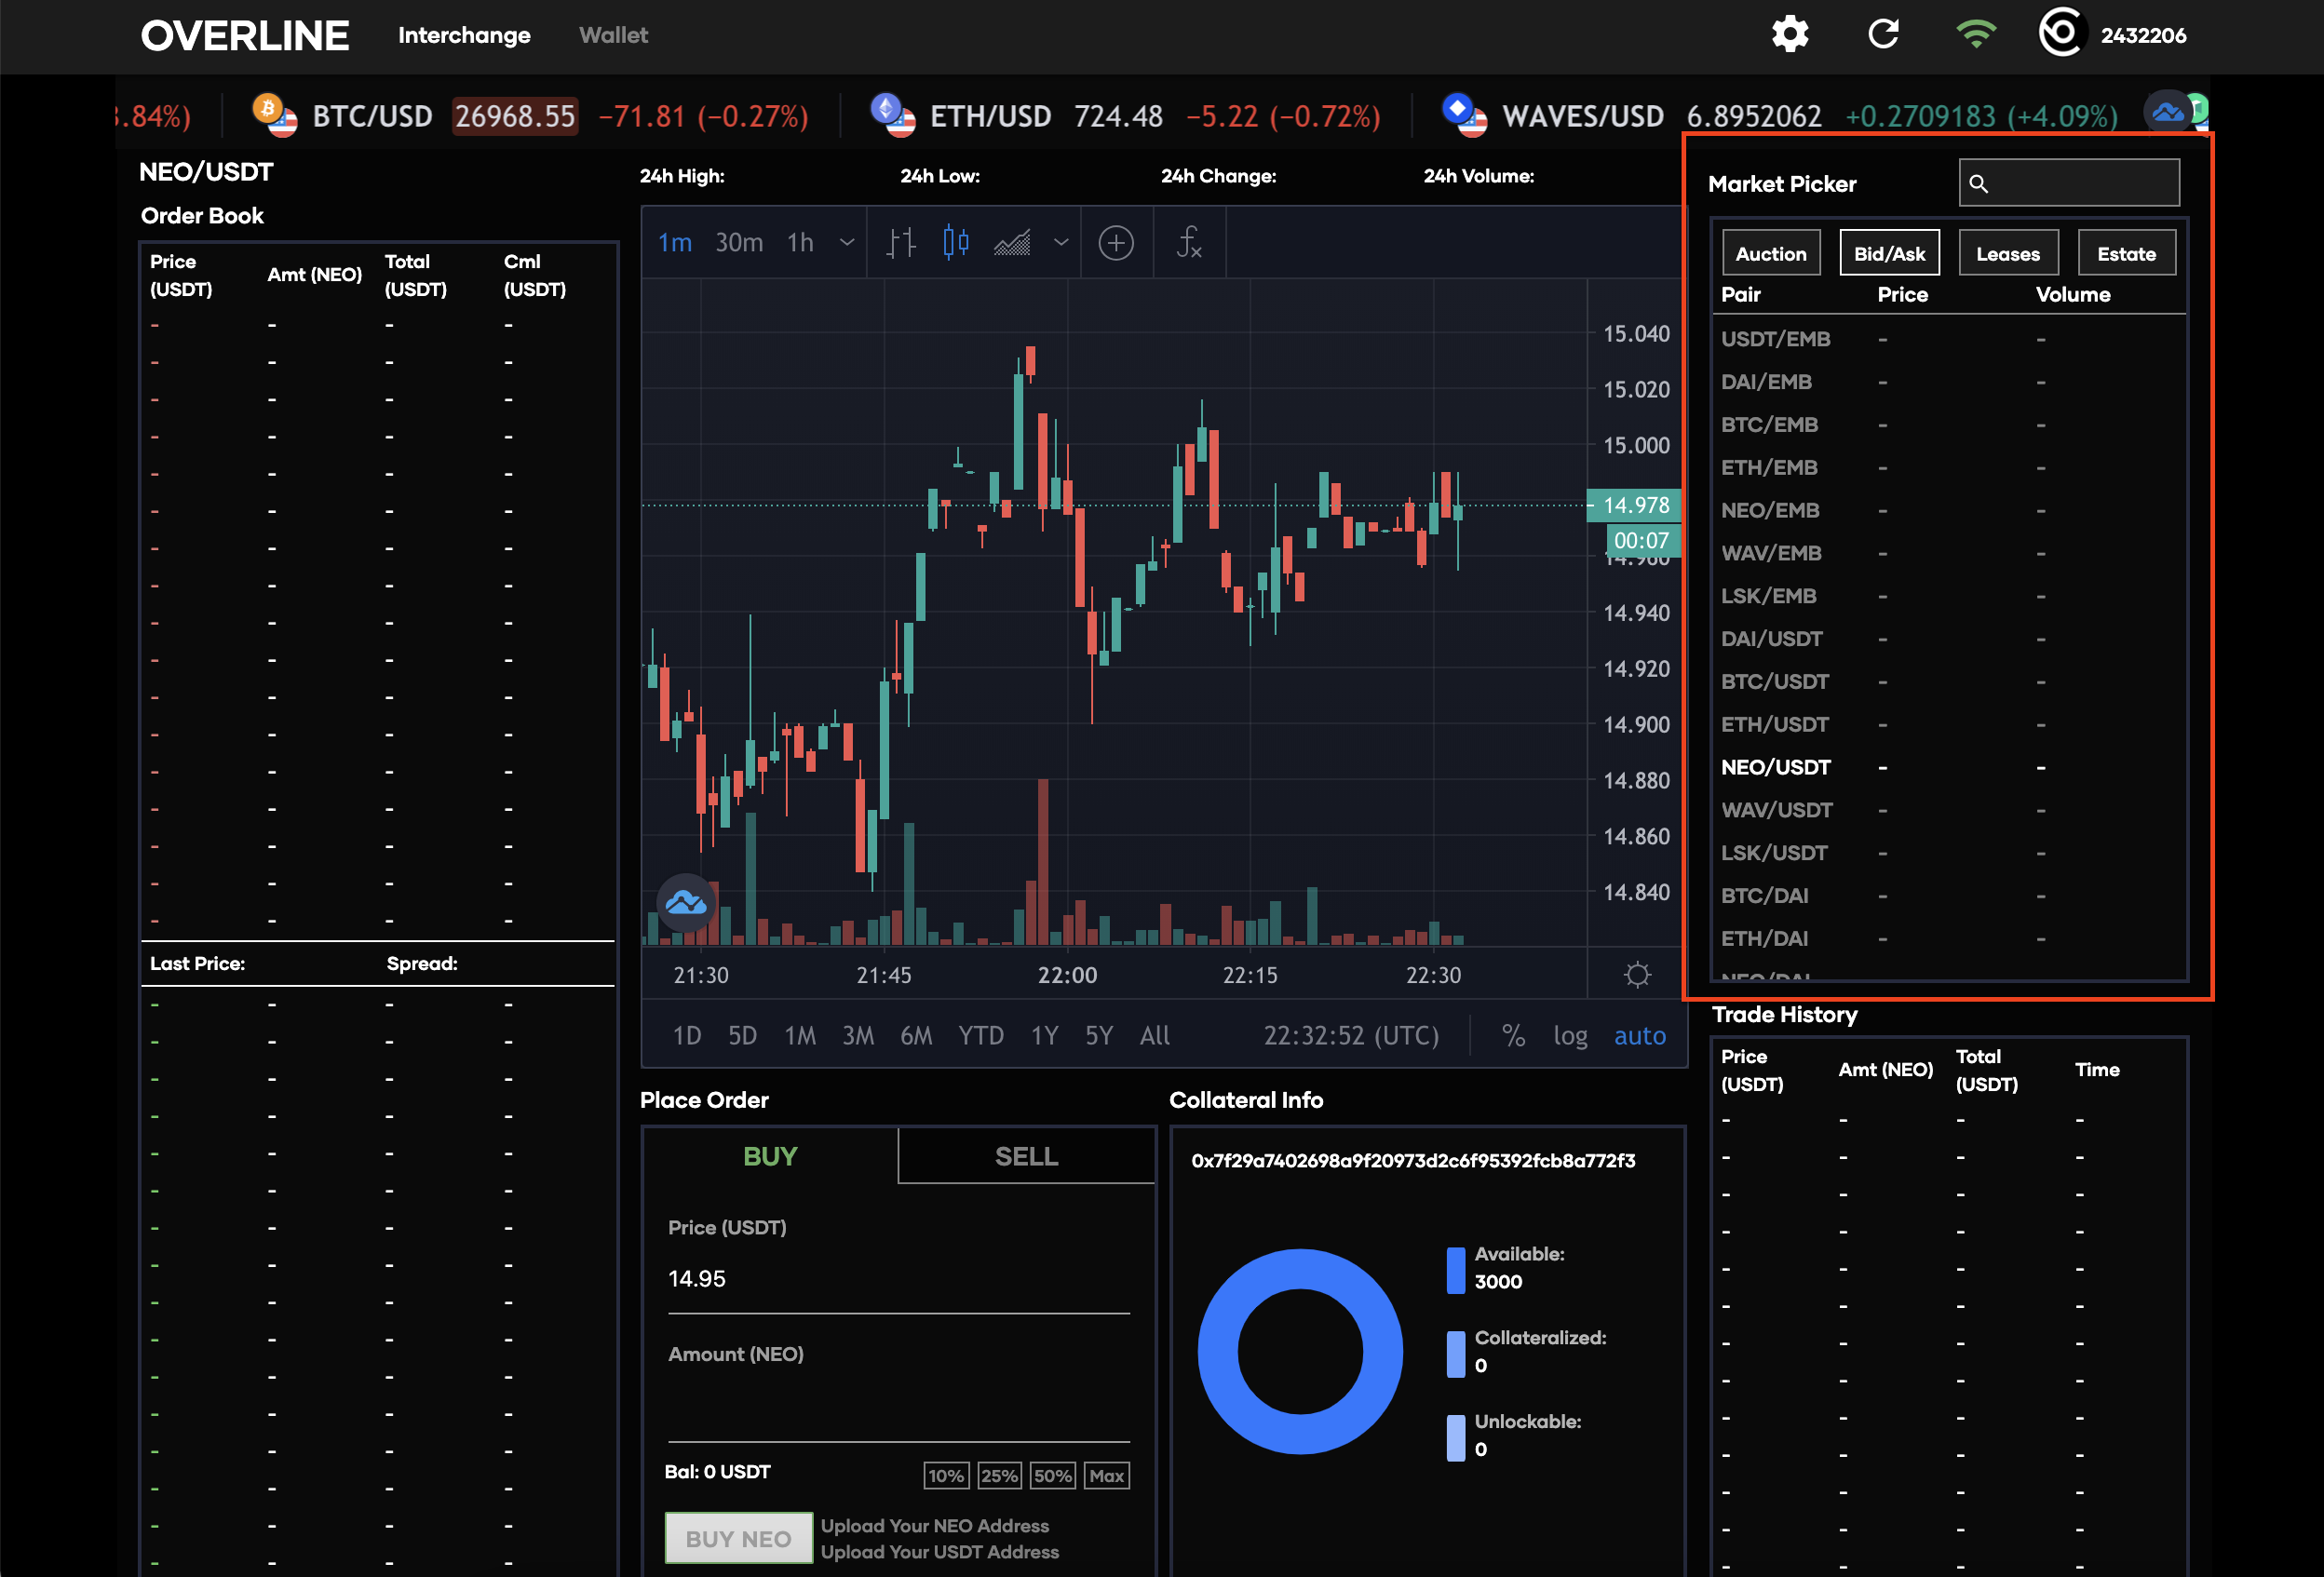
Market Picker is where you will begin your trading experience in the trade tab. Select a trading pair from the list on the righthand side of the section and the entire page will refresh with order books, trade history, and Buy/Sell options for that specific pair.
Market Picker: Bid/Ask vs Auction
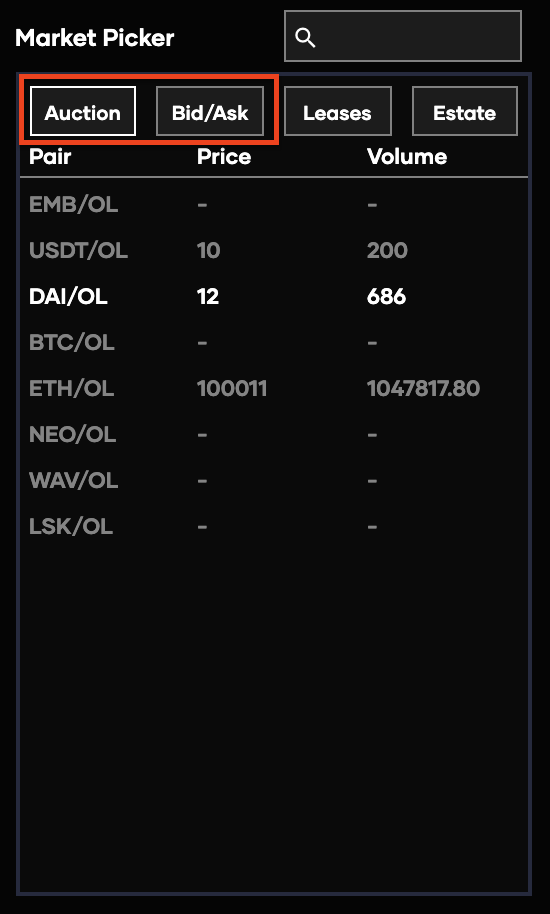
Most pairs use the Bid/Ask system: both side collateralize the trade with Overline in order to participate. Overline pairs, however, utilize a different system: Auction. In these trades, only the maker has to lock up Overline (amount to be traded) and sets a base fee in Overline that the taker must pay into the order to take the order. This is to ensure that the abuse of maker orders has consequences. Once the order has been taken, only the taker has to send their asset which unlocks the maker’s original Overline amount to the taker. In the case that the taker doesn’t send their asset, the maker can unlock his Overline.
Trade History and Price Chart
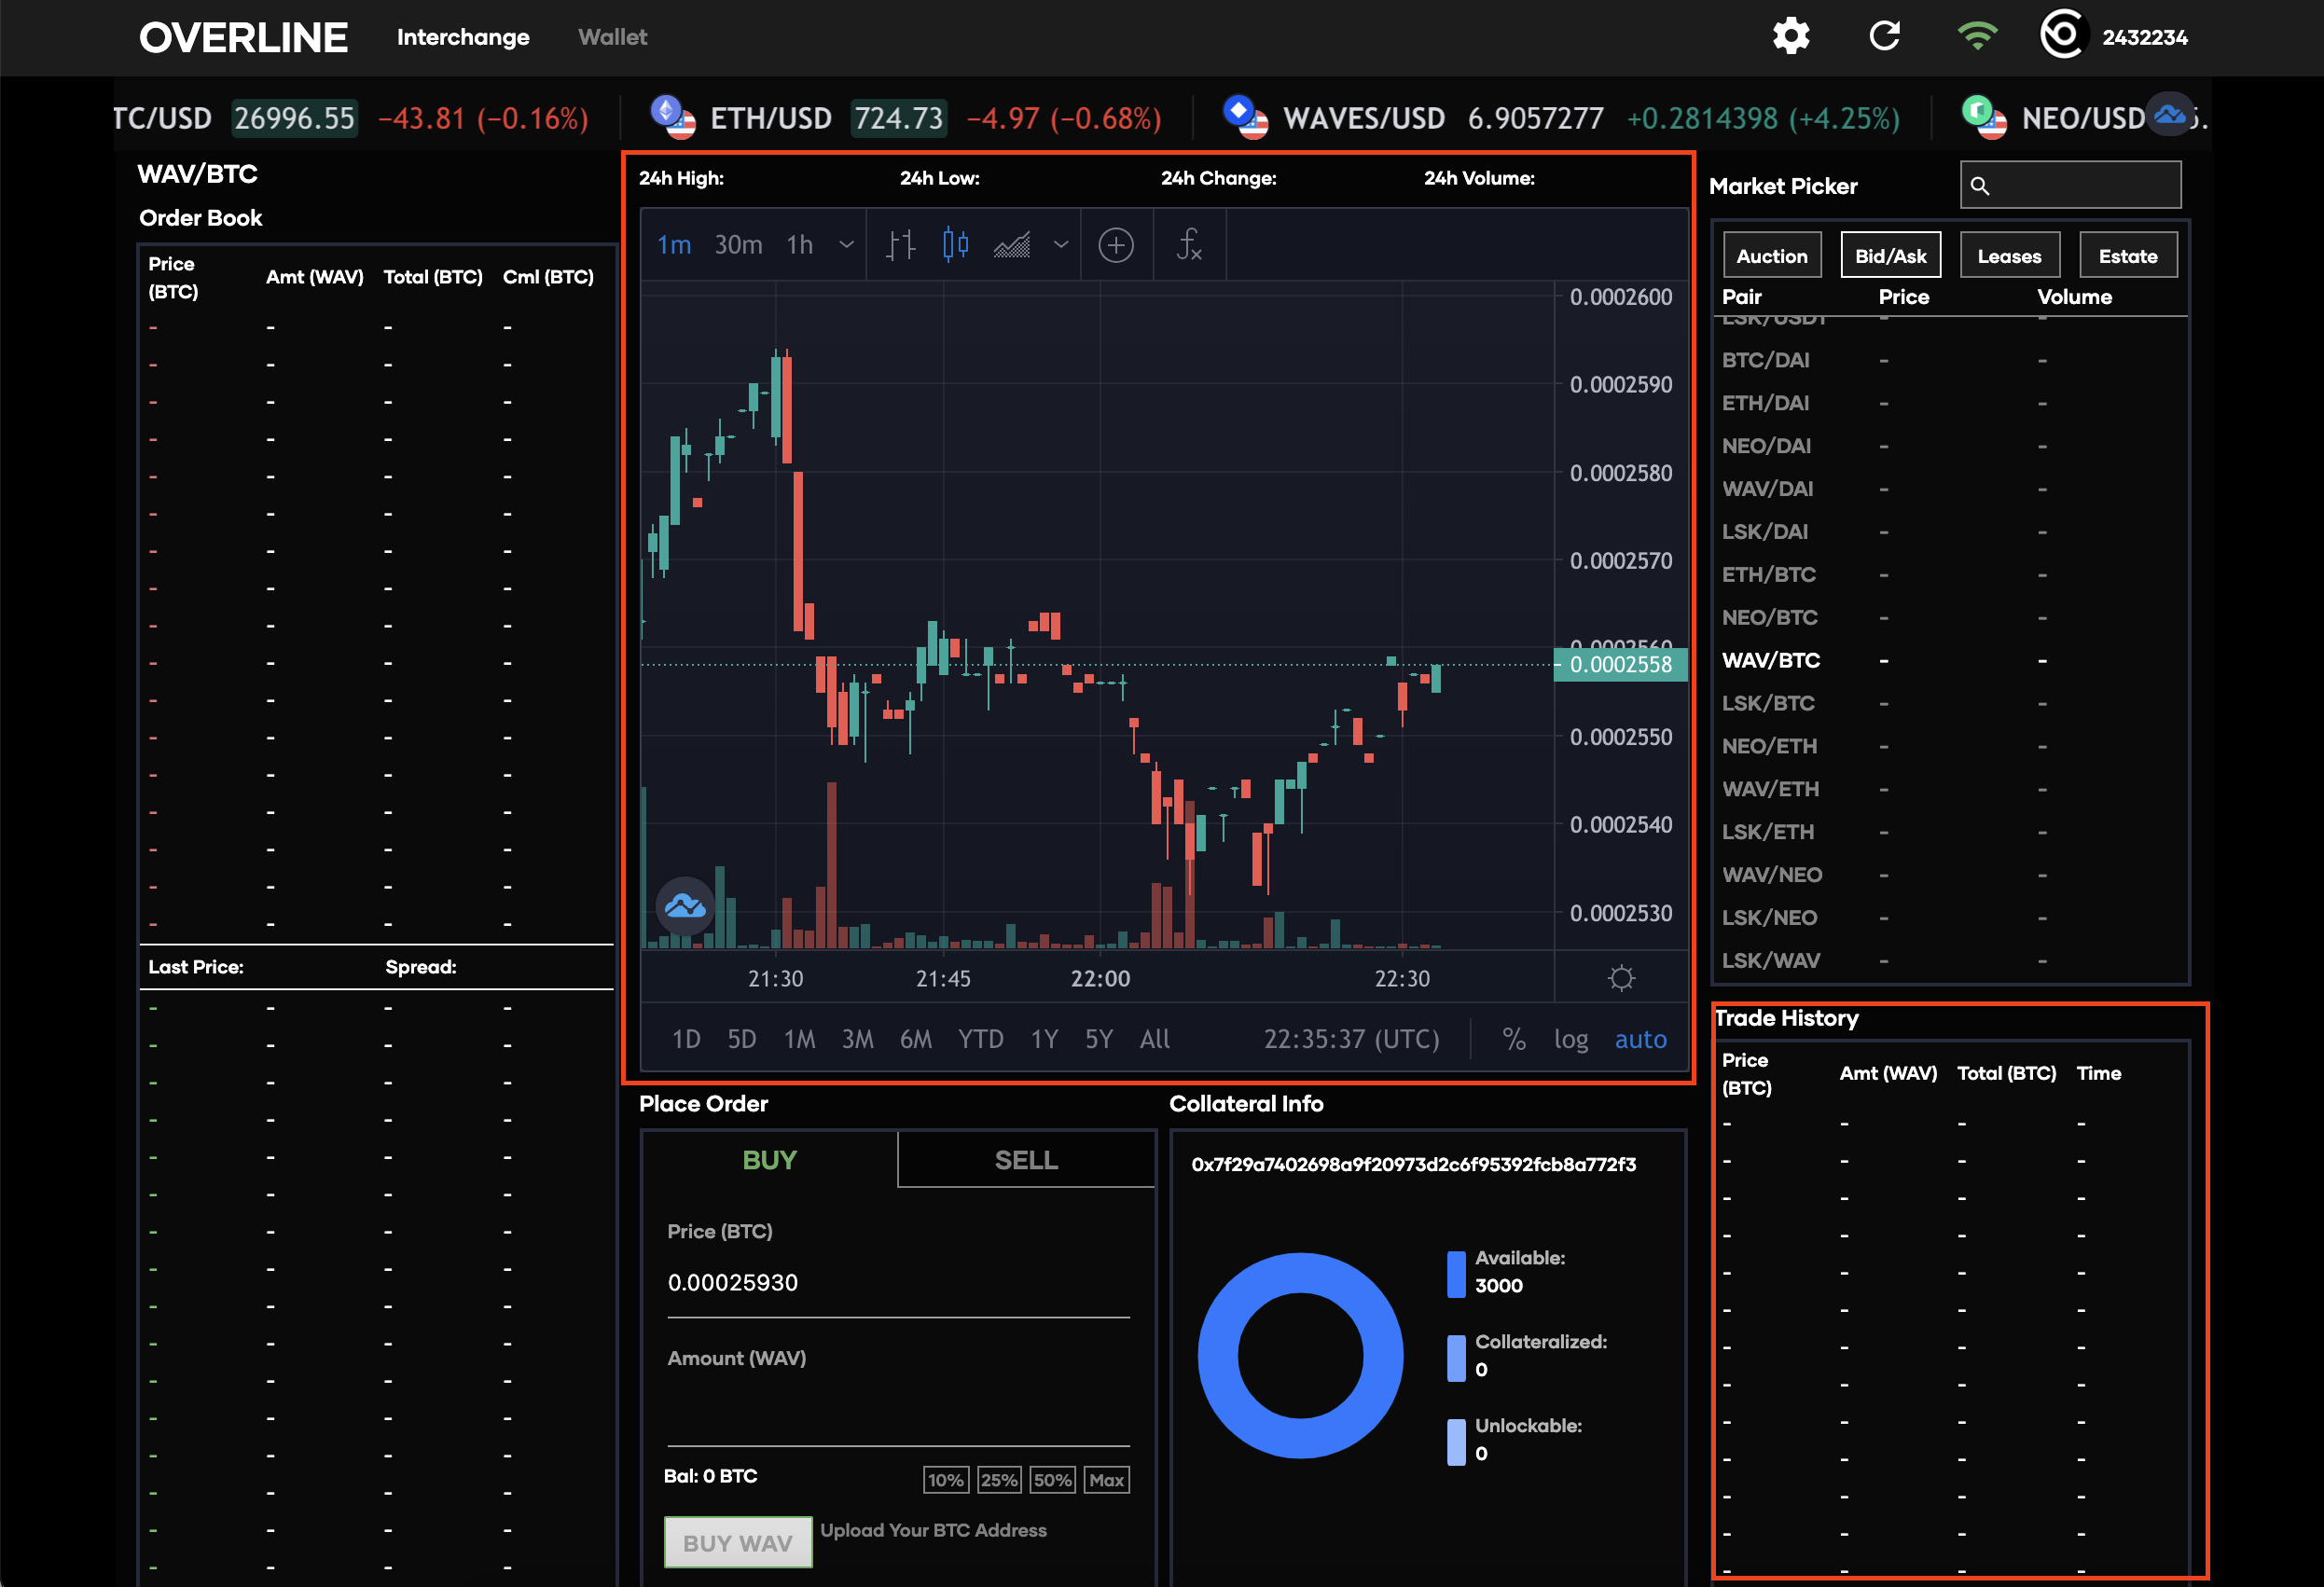
The trade history for a selected market picker pair can be found on the lower righthand section of the interface. Trades will show up in this section after they have been taken. The displayed Trade History will go back 50 orders. The Price Chart is a live and interactive chart of the Trade History section which shows all historical orders executed on that specific pair on the Overline interchange.
NOTE:
You MUST have wallets from both sides of the pair active in the interchange to execute the trade.
Order Book and Depth Chart
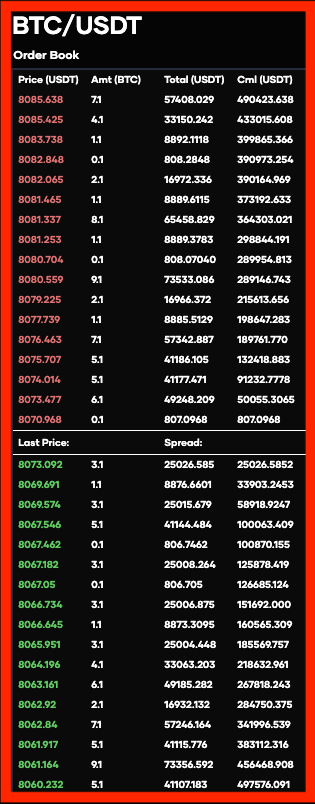
Order Book shows all open orders which have yet to be taken. This is where you can select orders to fulfill. You can automatically fill orders from the Place Order section by clicking on an Open Order. Orders can be removed from the Order Book by the order getting taken or the Order Lifespan ending. Depth Chart is a visual representation of order book and signifies the relationship between the number of Buy and Sell orders.
Place Order - Buy / Sell
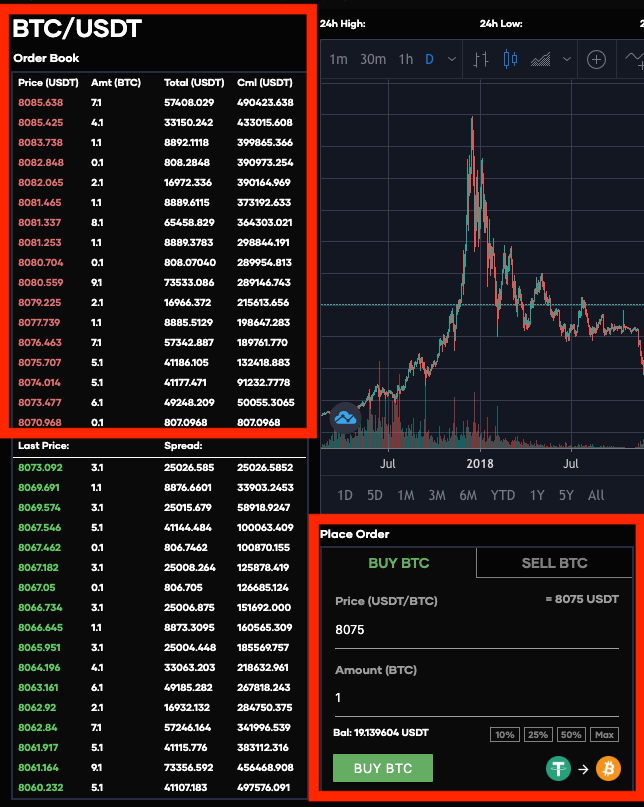
This section is where your can place buy or sell orders for your selected pair. You can either manually create a Buy or a Sell Order which would sit on the Order Book or a fulfill an existing Order which will take the existing order off of the Order Book. For a manual Buy or Sell Order, you will need to set the price you wish to trade at and the amount of the token you wish to buy / sell. If you are fulfilling an existing order you can autofill all fields by clicking the order in the Order Book.
Place Order - Confirmation Screen
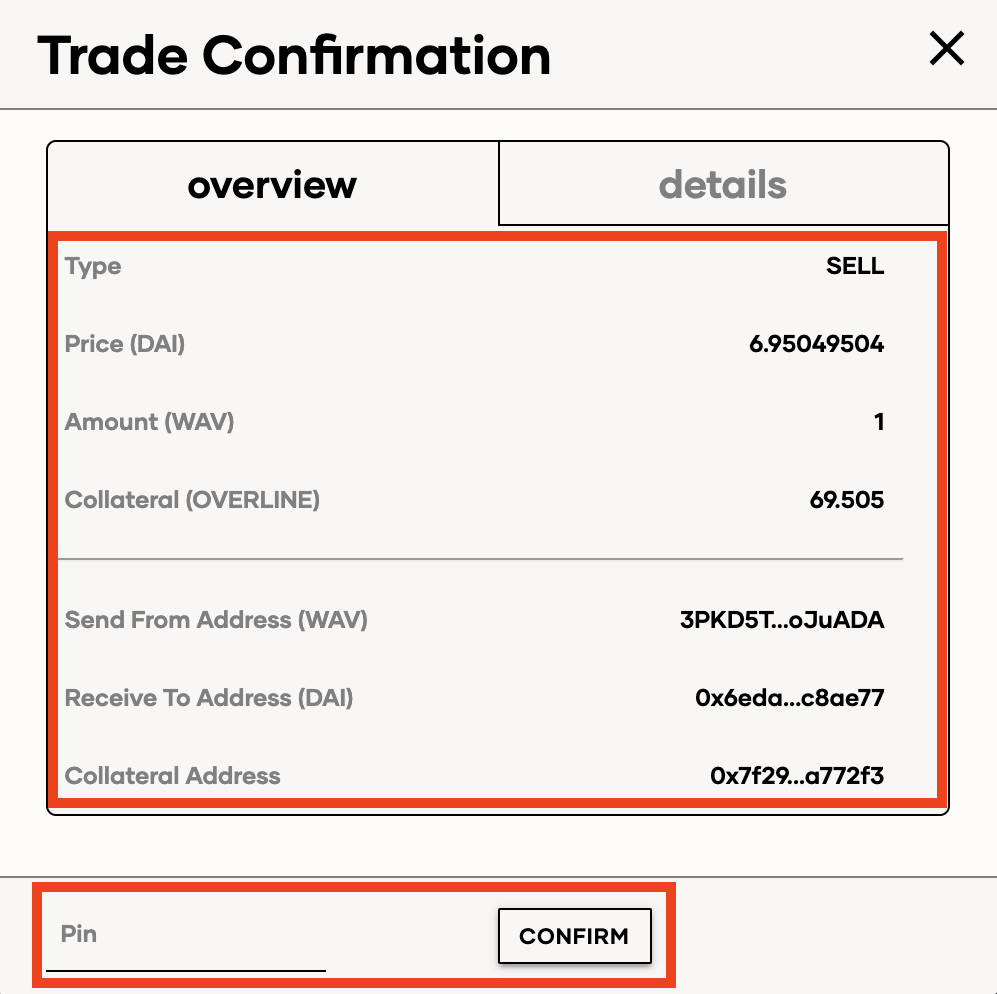
To finalize placing either a Buy or a Sell order, you will be shown a confirmation screen which shows all of the relevant details for your order. The Type of order, amount to Receive, amount being Sent, amount of collateralized Overline, and Settlement Deadline. This page will also require your session's Pin to confirm the order.
Place Order - Setting Overline Collateral Amount
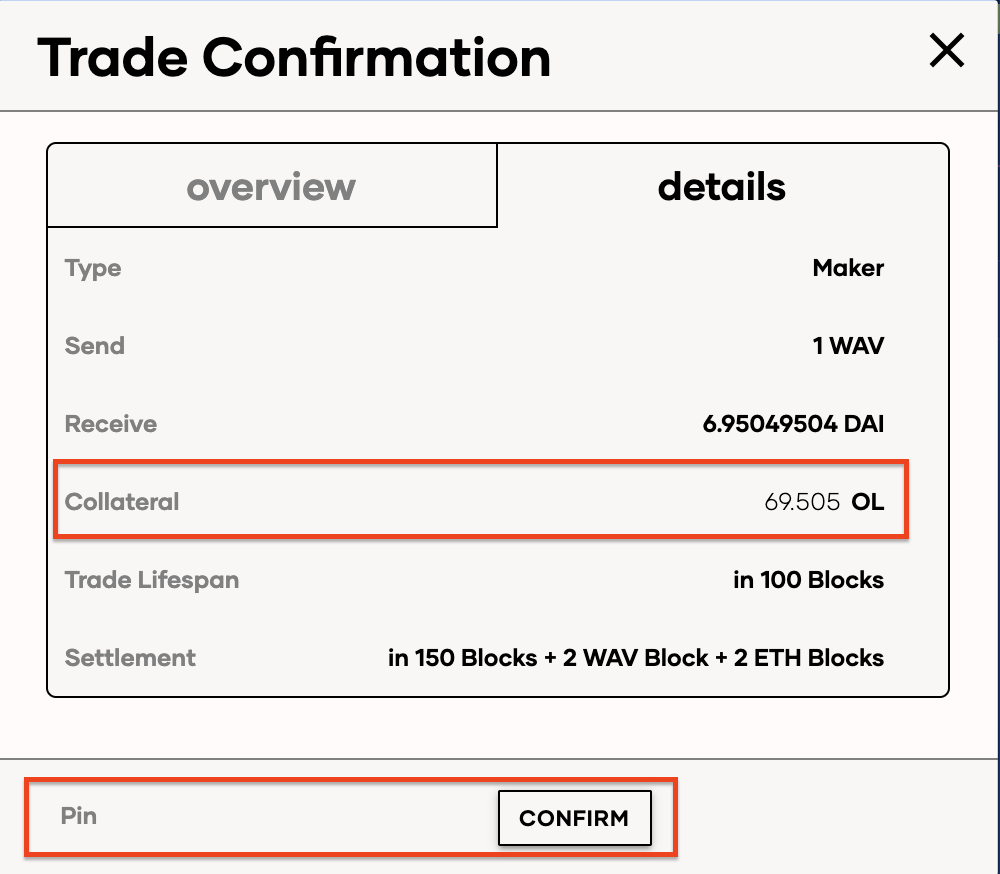
When placing an order, as a maker, you will decide and set the amount of Overline required to collateralize the entire trade. This action is available on the Order Confirmation screen. When placing an order as a taker, you will be shown the amount of Overline required to collateralize the order on the Order Confirmation screen as well, however you will not be able to adjust it. NOTE: In some cases, a particular order placement may see you as both the maker and the taker, in which case you will need to set the Overline collateral for parts of the order.
Overline Collateral
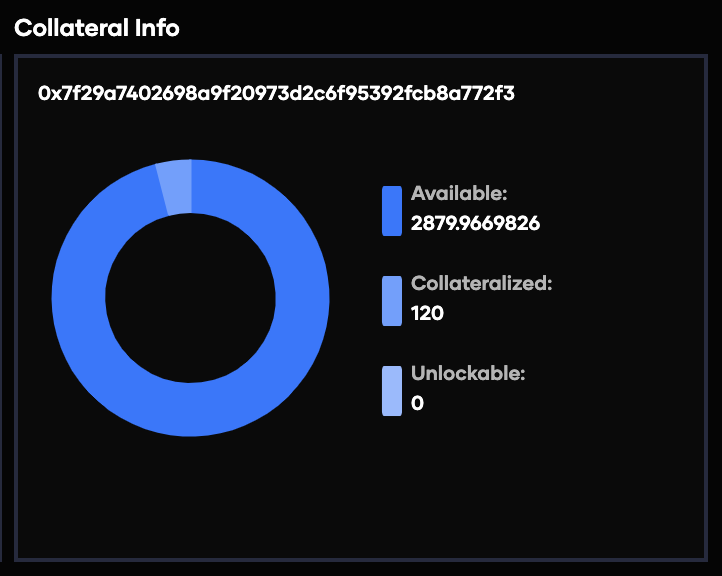
This section will display the real time amount of Overline required to be allocated to your current trade. Additionally, this section displays how much of your available Overline is currently being spent or collateralized.
Open Orders
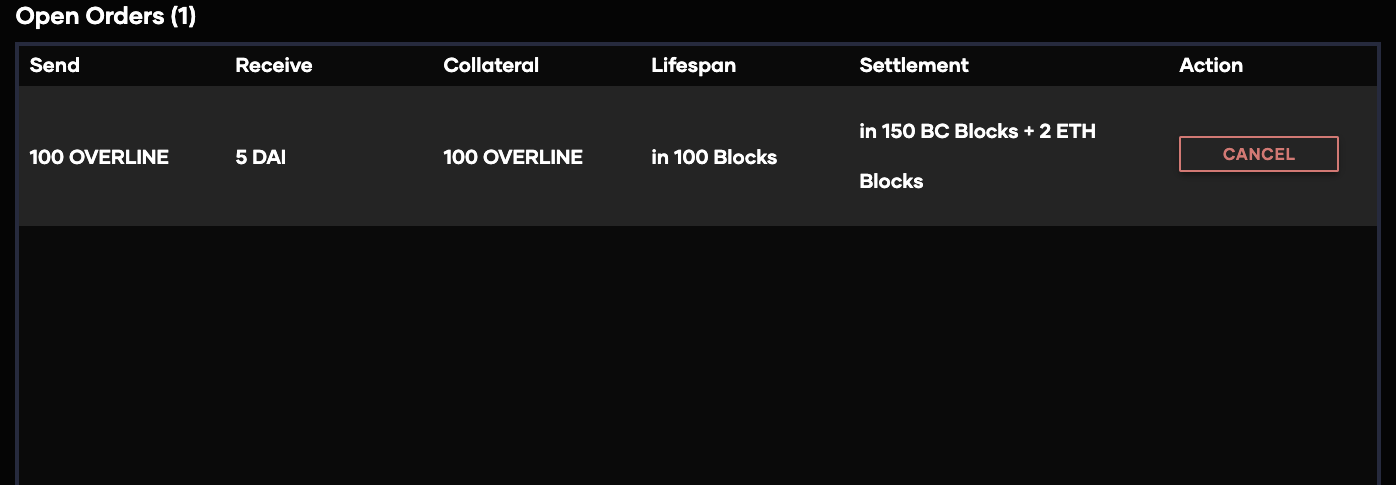
Open Orders show the summary for all the open Buy or Sell Orders that you have placed, but have not been fulfilled by any other trade partners. These orders will stay here as long as the Order Lifespan is set for. Read more about Order Lifespan in the Settings section later in this article. If it is matched, it will be sent to the Matched Orders, if it is unmatched and passes the Order Lifespan, it will go to the Unmatched Orders section.
Matched Orders
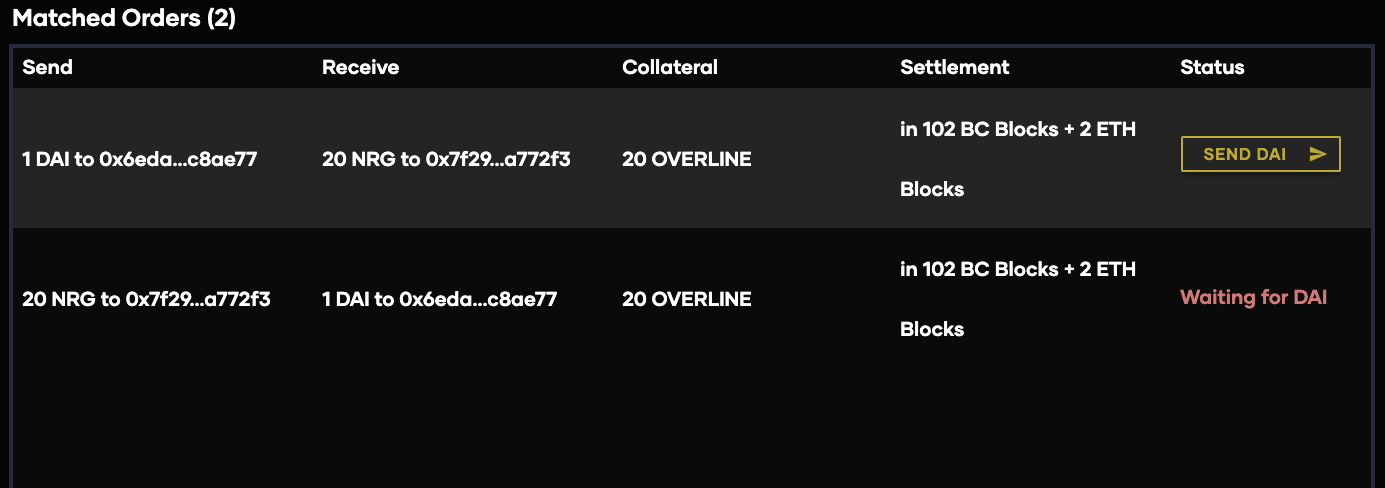
Matched Orders shows the summary for all the open Buy or Sell Orders that you have placed, have been matched to a trade partner, but have not yet been fulfilled by both parties. In order to complete the trade, you must send your side of the trade which can be done here by clicking "Send (YOUR SIDE'S TOKEN)". To see what the scenarios are for sending/not sending the different sides of the trade, check out this article.
Matched Unlockable Orders
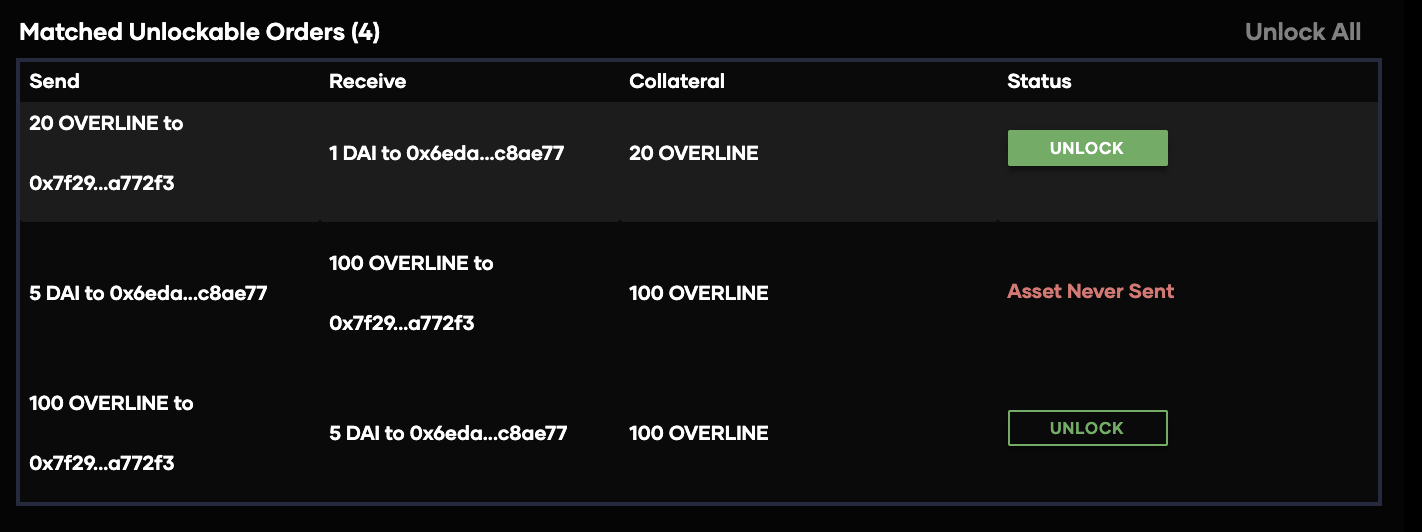
Matched Unlockable Orders is where you can see the Orders you have placed, both Completed and Unfulfilled. This section is also where you can retrieve your collateralized Overline. If the tokens for both sides have been sent or if both sides do not send their tokens by the end of the Settlement Length, both parties will be able to retrieve their collateralized Overline in the Historical Orders section. If only one party submits their tokens, all collateralized Overline will be unlocked and retrievable by the submitting party in this section.
Unmatched Orders
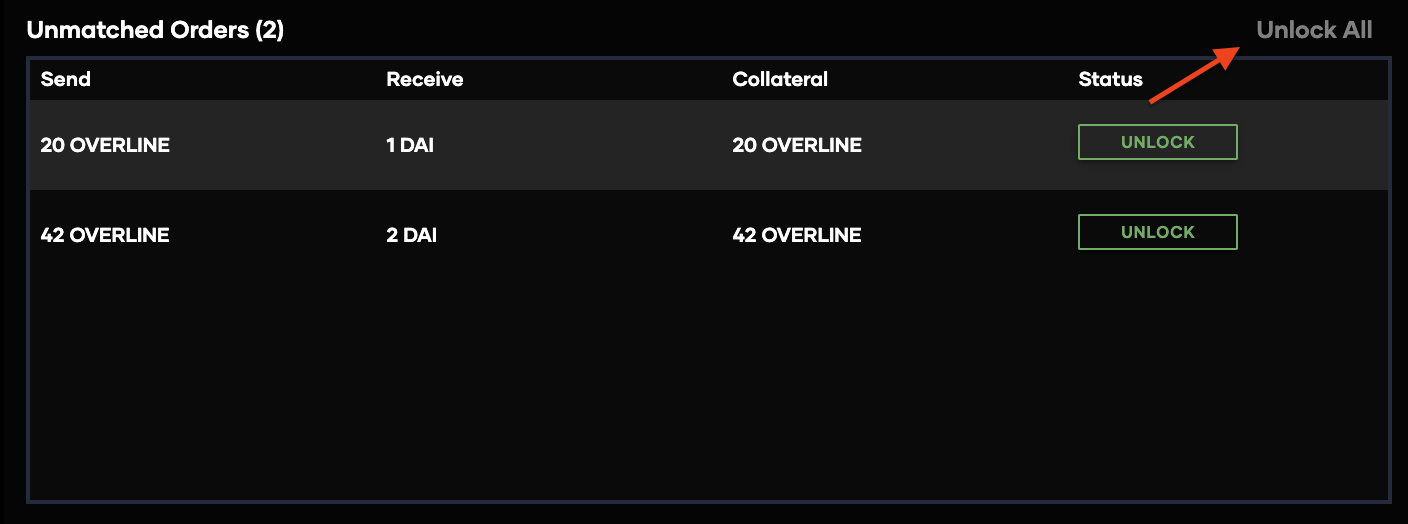
Unmatched Orders is where users will unlock all orders they have placed but were unmatched and have had their set "Order Lifespan" time limits expire. While the pair tokens have not left the wallet, users can retrieved their collateralized Overline here by clicking "Unlock Collateral".
If you have more than one Unmatched Order, you can unlock all orders using the "Unlock All" button on the top righthand corner of the section.
7. Trade Settings and Connection Settings
Trade Settings: Order Lifespan
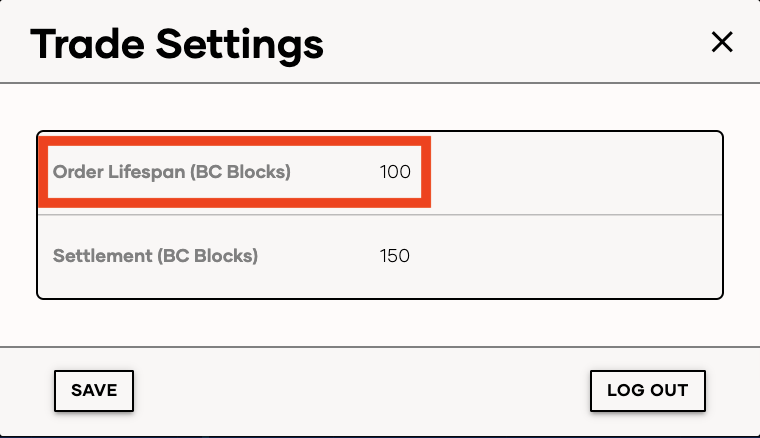
The Order Lifespan setting is the amount of time, in terms of Overline Blocks, that a Maker will wait for a Taker to accept their trade before the offer is taken off the Order Book. Trades that are placed but unmatched after the Order Lifespan will be sent to the Unmatched Orders section on the trade page.
Trade Settings: Settlement
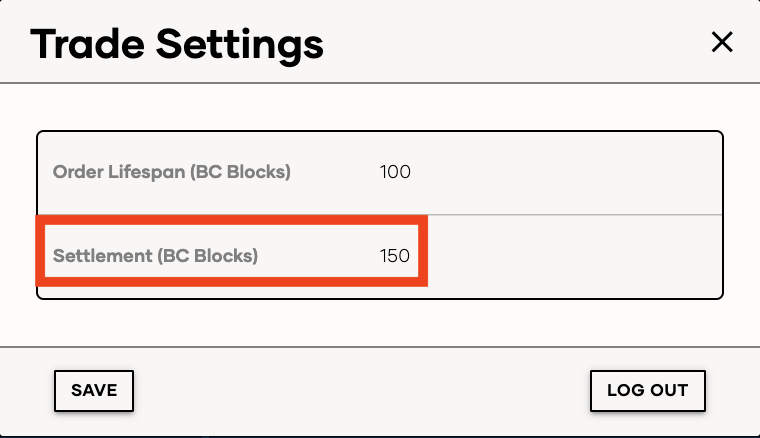
Settlement is the setting that will allow you, as a Maker, to determine how long both parties of the trade have to fulfill their respective sides of that order. The settlement window begins when a Taker accepts a trade. At the end of the Settlement Length for both a successful trade (both parties send their tokens) and a unfulfilled trade (both parties don't send their tokens) will see their respective collateralized Overline unlocked, to be retrieved by the users and returned to their available Overline balance. For a trade that is completed by one user, the end of the Settlement Length will see all collateralized Overline in the given trade be delivered and retrievable by the user that sent their side of the trade. Read more about this process here.
Trade Settings: Log Out
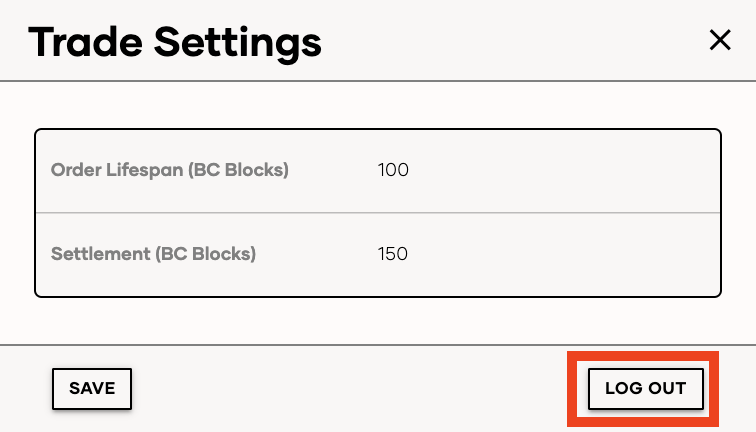
If a user wishes to end their interchange session, they can click "Log Out" which will immediately unlink all wallets and take them to the interchange home screen.
Connection Settings: Automatic
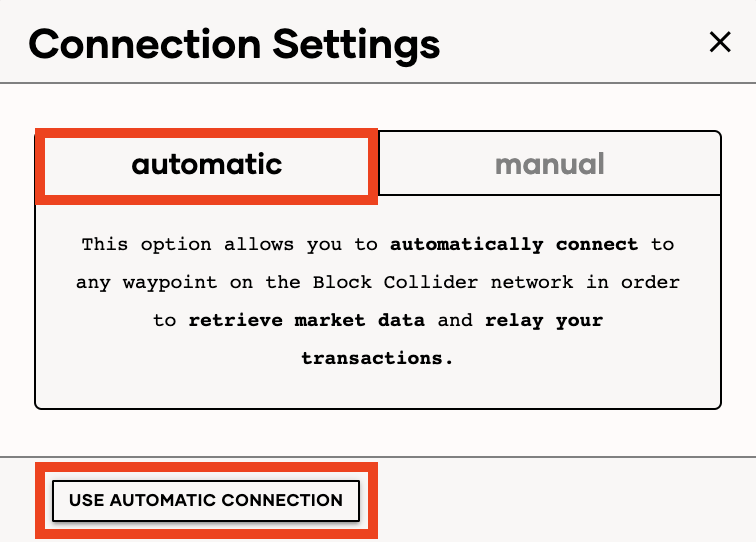
Using the Automatic setting will automatically connect you a randomly selected, secure miner which will retrieve market orders and relay your transactions on your behalf.
Connection Settings: Manual
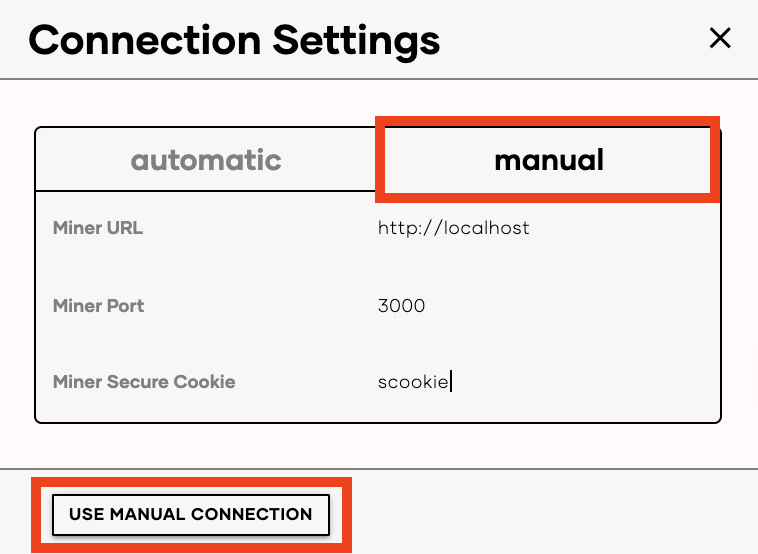
Using the Manual setting will allow you to access the Overline network via your local miner. This is the most secure and recommended way to use the interchange.
Connection Settings: Miner URL
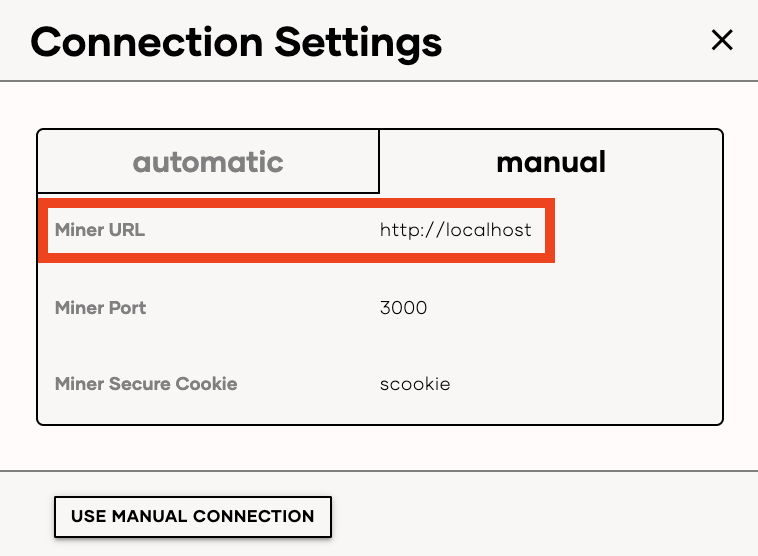
This is the address of the Overline miner that you are running, from the beginning of these instructions. This is will usually, and by default, be "localhost". This field will also support hosted mining services (such as an ngrok tunnel) for those who do not want run their own miner.
Connection Settings: Miner Port
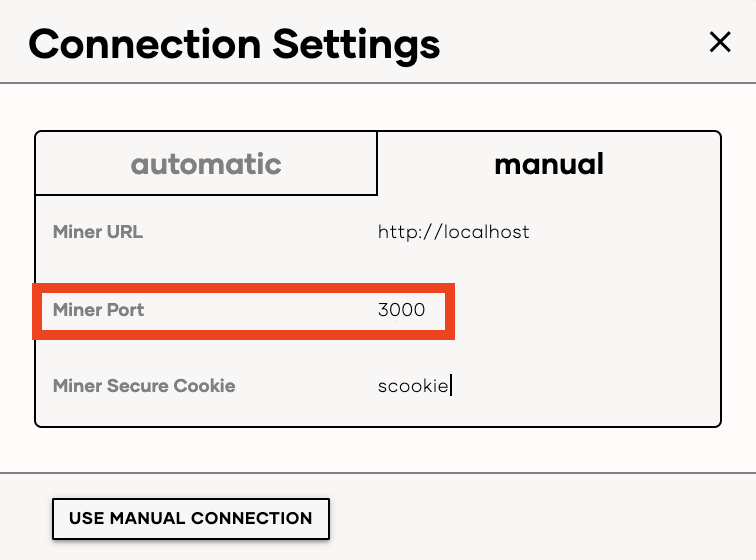
Whether you are running the miner locally or remotely, this will be the specific port where you miner is running. If you are running it remotely and designate the port in your remote address, this can be left blank. This will default to "3000".
Connection Settings: Miner Secure Cookie
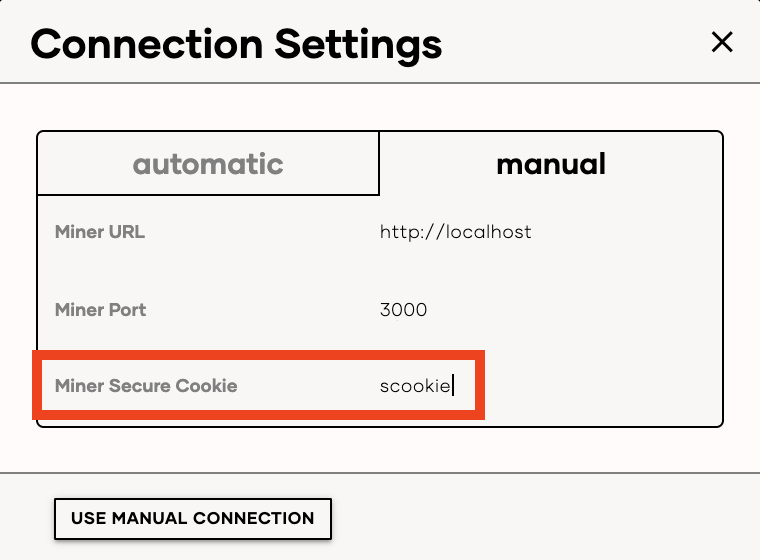
The unique secure cookie ("scookie" in the run command) you entered when running your miner if you followed the Mining Tutorial.
Updated over 2 years ago
