Tutorial: Local CPU Miner

Whether you are new to mining a blockchain or are an experienced pro, mining the Overline network is easy and this guide serves as the recommended method of getting started.
Mining the Overline multichain is the main way to earn rewards (OL) from the network, as well as the only way to access the Overline interchange.
For a quick refresher on what it means to mine a blockchain, review Sections 1 & 2 on this site.
System Requirements
| Software |
| - Windows: Windows 8 Pro (hypervisor support) through Windows 10 (hypervisor support) |
| - Linux: Ubuntu 16.04 LTS or greater up to Ubuntu 19.04 |
| - Mac: OSX 10.8+ |
| Hardware |
| - 22 GB HDD, 8GB RAM (minimum 6GB) |
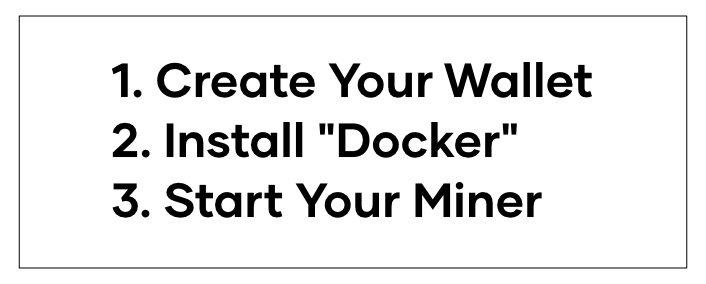
To begin mining, proceed with the following steps:

1. Create Your Wallet: Store It Someplace Safe
In order to mine Overline you will need to assign an account (AKA: 'wallet') to your miner so any potential rewards from mining have a place to be stored. The specific account ('wallet') you will need is a Overline wallet, for the currency of the network: Overline.
Making a wallet is very simple, you can follow the steps below to generate your Overline wallet!
Create Your Wallet
This process has a few steps but is very straight forward, and will be familiar to those who have created blockchain wallets in the past.
First go to this page:
Overline interchange Wallet Website
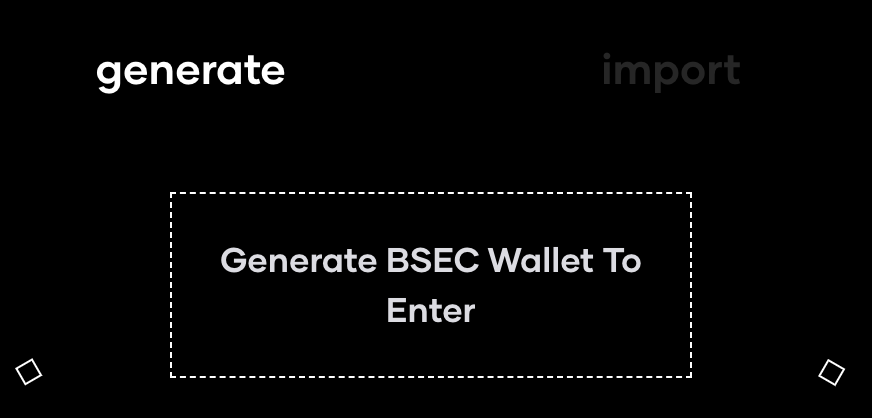
Then click the box labelled "Generate BSEC Wallet":

Save That File!
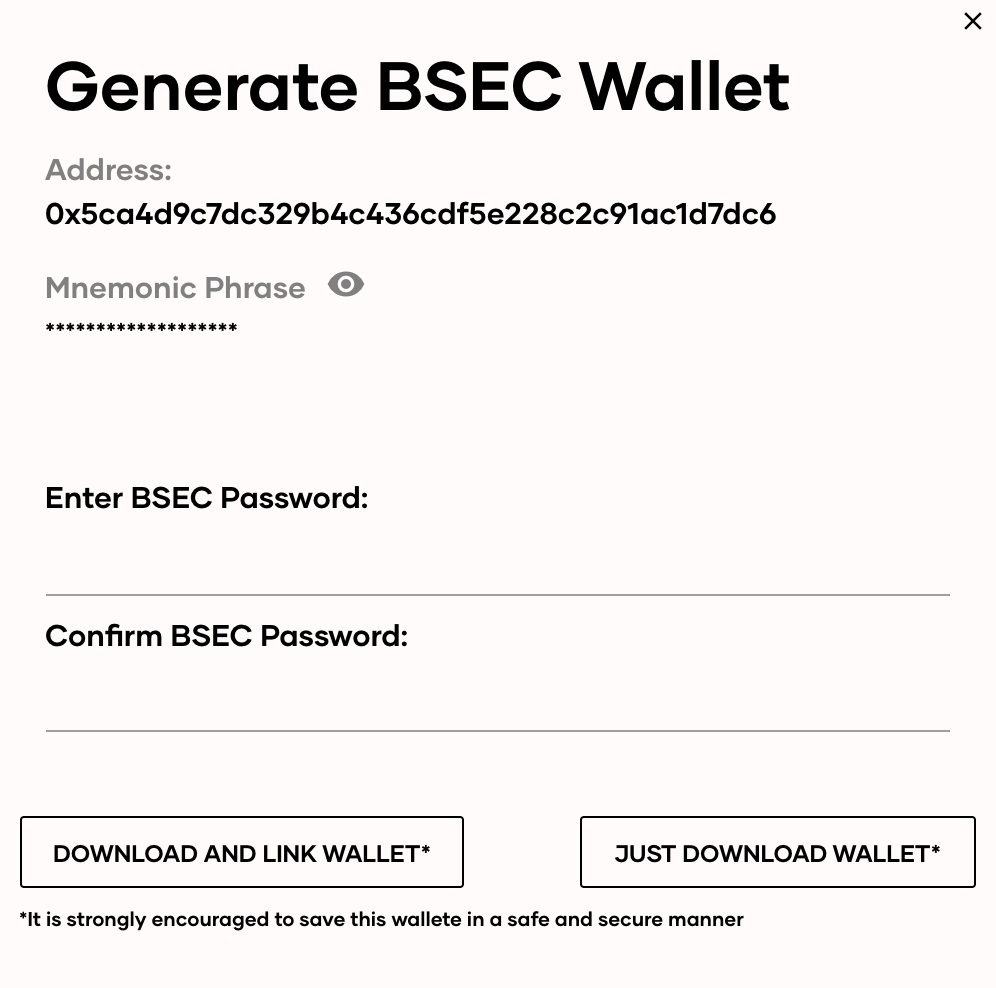
You now have a file that has everything you need to mine! Next, you need to save it to your computer. Click "Just Download Wallet". This will automatically save a wallet file (.json) to your computer. The file can be opened in Text Editor or similar programs and contains your Public and Private keys.
IMPORTANT:
You MUST save your wallet file (wallet.json) or you will not be able to access your wallet in the future.
This should worry you.
While cryptocurrencies provide unparalleled technological security, the cost of this security is that there is no "undo" button or "password reset" for your wallet. If you lose your Private Key, there is no failsafe.
We recommend taking the security and privacy of your wallet very seriously. Rule of thumb is do everything as slow as possible, especially the first time.
Here is a video with some popular ways of ensuring that your wallet (that new file) is secure: https://www.youtube.com/watch?v=Dtsmrb4Gyck

In the screen above, there is a string of text that is labelled Address:
Address:
<YOUR_PUBLIC_ADDRESS>
Copy that text of the "<YOUR_PUBLIC_ADDRESS>" on that page, or leave it open and available to copy, because you will need to paste the <YOUR_PUBLIC_ADDRESS> into a command later that will start your miner and give you credit for using your computer to run the network.
2. Install "Docker": Time To Download
Starting up the Overline miner from scratch is very useful for advanced users. In order to level the playing field for users just getting started, a tool called "Docker" will help take care of the complicated bits and allow us to run our miner using one command!
"Install "Docker"
The steps to download Docker Community Edition are straightforward. Depending on your computer's operating system, click the correct link below:
- Mac*: https://store.docker.com/editions/community/docker-ce-desktop-mac
- Windows*: https://store.docker.com/editions/community/docker-ce-desktop-windows
- Other: https://www.docker.com/community-edition#/download
*Older versions of Mac or Windows may not be able to use Docker Desktop and may consider trying Docker Toolbox. However, while some individuals running on old machines have successfully used Docker Toolbox, this is not officially supported.

"Docker for Mac" download page. Click Get Docker to download and get started.
Once the Docker application is installed, all that is necessary to begin mining is to run the command that gets your computer started!
3. Start Your Miner
If you are using a Windows machine open the pre-installed program called Command Prompt (may also be called "CMD Prompt").
If you are using a Mac or Linux computer then open the application called Terminal (pre-installed on all Mac/Linux machines).
The command below is the recommended template for your "start running my miner" command. You only need to update one thing:
- Replace <YOUR_PUBLIC_ADDRESS> in the command below with the Public Address you copied earlier in step #1 when you created your wallet.
docker run --rm --name bcnode \
--memory-reservation="6900m" \
-p 3000:3000 -p 16060:16060 -p 16061:16061 -p 36061:36061 -p 36060:36060 \
-e BC_MINER_KEY="<YOUR_PUBLIC_ADDRESS>" \
-e BC_NETWORK="main" \
-e BC_FORCE_MINE=true \
-e MIN_HEALTH_NET=true \
-e NODE_OPTIONS=--max_old_space_size=6096 \
blockcollider/bcnode:latest \
start --rovers --rpc --ws --ui --node --scookie "scookie" 2>&1
NOTE: WINDOWS USERS
A few users have reported the backslash "" does not work in some windows shells. If so replace the <YOUR_PUBLIC_ADDRESS> with your Public Address in the following single line command.
docker run --rm --name bcnode --memory-reservation="6900m" -p 3000:3000 -p 16060:16060 -p 16061:16061 -p 36061:36061 -p 36060:36060 -e BC_MINER_KEY="<YOUR_PUBLIC_ADDRESS>" -e BC_NETWORK="main" -e BC_FORCE_MINE=true -e MIN_HEALTH_NET=true -e NODE_OPTIONS=--max_old_space_size=6096 blockcollider/bcnode:latest start --rovers --rpc --ws --ui --node --scookie "scookie" 2>&1
Copy and paste that command, with the updated text, into your Terminal or Command Prompt.
Hit the return/enter key and that’s it!
You are officially powering up Overline on your machine.
It may take a while for everything to sync between you and the network (you can speed this up by following the Optional Step 4). Once complete, you are mining Overline!!
Congratulations!
NOTE: Change "scookie" for advanced RPC calls or use of Portfolio.
For the purposes of mining, "scookie" in the commands above can be left as is. However, if you want to use the more advanced features of Overline like using the RPC API calls or viewing balances on the Portfolio page, "scookie" will need to be a unique value that only you know (can be changed each time you run the miner).
4. Optional: Preload Multichain History w/Community Snapshot
Miners can skip the process of waiting to sync the entire chain and may use a snapshot of the Overline chain to accomplish a majority of the heavy lifting to achieve initial sync. To download and import the latest community snapshot by following the instructions:
NOTE
This is to be used with the understanding that this snapshot functionality is for the purposes of continued testing and, while very useful for speeding up sync times, is not a recommended feature.
-
From your command line, navigate to your root directory (wherever you are running the docker run commands from).
-
Create a file called "import-db.sh" and populate it with the following text:
#!/usr/bin/env bash
set -euo pipefail

NC='\033[0m'
RED='\033[0;31m'
GREEN='\033[0;32m'
YELLOW='\033[0;33m'

if [ $# -eq 0 ]
  then
    echo -e "${RED}Error: No arguments supplied".
    echo -e "Usage: $0 /path/to/bcnode-db-2029-11-12_13-14-15.tar.gz"
    echo -e "       $0 /path/to/_easysync_db.zip${NC}"
    exit 1
fi

database_location=$1
bcnode_container_name=bcnode
database_volume_name=db

if [ ! -f "${database_location}" ]; then
  echo -e "${RED}Error: Missing import file ${database_location}${NC}"
  exit 1
fi

echo -e "${GREEN}Preparing to import the blockchain database from ${database_location}...${NC}"
docker rm -f importdb > /dev/null 2>&1 || true

read -p "This will stop the container if ${bcnode_container_name} is currently running. Are you sure? " -n 1 -r
echo    # (optional) move to a new line
if [[ ! $REPLY =~ ^[Yy]$ ]]
then
    echo -e "${GREEN}This was a close call man!${NC}"
    exit 1
fi

if [ -f "./cleanup.sh" ]; then
    sh ./cleanup.sh || true
else
  echo -e "${GREEN}Stopping current ${bcnode_container_name} container if running...${NC}"
  docker rm -f ${bcnode_container_name} > /dev/null 2>&1 || true
fi

existing_volume=$(docker volume ls -q -f name=${database_volume_name} | grep -w ${database_volume_name}) || true
if [ -z ${existing_volume} ]; then
  echo -e "${YELLOW}Warning: No named Docker volume \"${database_volume_name}\" found, creating it..."
  echo -e "Make sure it's going to be attached to the ${bcnode_container_name} container!${NC}"
  docker volume create ${database_volume_name}
else
  read -p "This will delete the local blockchain copy in Docker volume ${database_volume_name}. Are you sure? " -n 1 -r
  echo    # (optional) move to a new line
  if [[ ! $REPLY =~ ^[Yy]$ ]]
  then
      echo -e "${GREEN}This was a close call man!${NC}"
      exit 1
  fi
  docker volume rm ${database_volume_name}
fi

echo -e "${GREEN}Starting dummy container to access ${database_volume_name} volume...${NC}"
docker run -d --rm --name importdb -v ${database_volume_name}:/root alpine tail -f /dev/null

tmp_dir=`mktemp -d`
echo -e "${GREEN}Extracting database $1 to ${tmp_dir}${NC}"
if [ ${1: -3} == ".gz" ]; then
  tar -xf $1 -C ${tmp_dir}
else
  if [ ${1: -4} == ".zip" ]; then
    unzip $1 -d ${tmp_dir}
  fi
fi
rm ${tmp_dir}/_data/db/IDENTITY > /dev/null 2>&1 || true
rm ${tmp_dir}/_data/.chainstate.db > /dev/null 2>&1 || true

echo -e "${GREEN}Latest database timestamp:"
ls -Artls ${tmp_dir}/_data/db/*.sst | tail -n 1

echo -e "${GREEN}Copying database to volume...${NC}"
docker cp ${tmp_dir}/_data/* importdb:/root

echo -e "${GREEN}Cleaning up...${NC}"
docker rm -f importdb > /dev/null 2>&1
rm -rf ${tmp_dir}

echo -e "${GREEN}Done."
echo -e "${YELLOW}Make sure to mount a named Docker volume using \"--mount source=db,target=/bc/_data\" when starting the container!${NC}"
echo -e "You can start the ${bcnode_container_name} container now!${NC}"
Save the file and continue to the next step.
- Enter the command:
chmod 700 import-db.sh
- Run the miner by entering:
docker run --rm --name bcnode \
--memory-reservation="6900m" \
-p 3000:3000 -p 16060:16060 -p 16061:16061 -p 36061:36061 -p 36060:36060 \
-e BC_MINER_KEY="<YOUR_PUBLIC_ADDRESS>" \
-e BC_NETWORK="main" \
-e BC_FORCE_MINE=true \
-e MIN_HEALTH_NET=true \
-e NODE_OPTIONS=--max_old_space_size=6096 \
blockcollider/bcnode:latest \
start --rovers --rpc --ws --ui --node --scookie "scookie" 2>&1
and then stop the container by entering:
docker stop
- Download the community multichain:
curl https://community.multichains.org/_easysync_db.zip -o _easysync_db.zip
- Import the multichain to your miner's memory:
./import-db.sh ./_easysync_db.zip
This will take a few minutes.
- Now start the miner by running the following script, which includes a command which updates the miner's local data:
docker run --rm --name bcnode \
--memory-reservation="6900m" \
-p 3000:3000 -p 16060:16060 -p 16061:16061 -p 36061:36061 -p 36060:36060 \
-e BC_MINER_KEY="<YOUR_PUBLIC_ADDRESS>" \
-e BC_NETWORK="main" \
-e BC_FORCE_MINE=true \
-e MIN_HEALTH_NET=true \
-e NODE_OPTIONS=--max_old_space_size=6096 \
--mount source=db,target=/bc/_data \
blockcollider/bcnode:latest \
start --rovers --rpc --ws --ui --node --scookie "scookie" 2>&1
That's it! Now your miner will sync much faster with the rest of the network.
What's Next?: Check Your Overline Balance
Now that you’re mining the Overline network, you are being rewarded in OL!
Helpful Link:
For more information on Overline, refer to this document.
You can view your accumulated Overline balance by visiting https://multiverse.blockcollider.org and searching for your "YOUR_PUBLIC_ADDRESS" that you copied earlier.
An alternative method of checking your balance can be achieved by going to the Overline interchange Wallet Page and viewing the Overline balances section from the wallet you created before. If your session has ended (and you are taken to the "Generate BSEC Wallet" page from earlier) simply select the Import option and then upload the .json file you downloaded and saved from earlier.
What's Next?: View Your Own Explorer
By running your own Overline node, you can view detailed information about the multichain you are now contributing to!
You can do this by navigating to http://localhost:3000/ once you begin syncing. This will take you to your own "multiverse" that is getting created through the process of syncing with the network. Obviously until a miner achieves full sync there will be differences between your multiverse and the one found on multiverse.blockcollider.org.
NOTE: Cross check your multiverse with the Explorer web page
A good way to verify that your miner is running as expected is to visit multiverse.blockcollider.org and check block height (for Overline chain and other child chains) and cross reference them with your localhost version.
Updated over 2 years ago
